New World Sourdough is a 2020 cookbook by Bryan Ford. I will not be reproducing Ford’s recipes in my blog. Read his blog, buy his book, support his work.
High Hydration Hijinks
My hydration concerns began before I even started this recipe. My starter, Bradley, has been fed the same diet for months: 2 parts water, 1 part AP flour, 1 part whole wheat flour. When I fed him in preparation for this recipe, my liquid starter seemed more liquid than usual.
This development suspiciously coincided with my first use of a different whole wheat flour–with King Arthur out of stock, I used the kind available at my local bulk food store. Evidently this (unknown to me) brand does not absorb water as well as King Arthur brand. The NWS toasty seed sour recipe is 30% whole wheat flour, so perhaps it is to blame for my later issues as well.
Another avenue I explored: what if my new oven light is hotter than my old one? Perhaps I was “overproofing” my starter. When I checked the temp, it was the optimal 72°, so I don’t believe heat is the culprit.
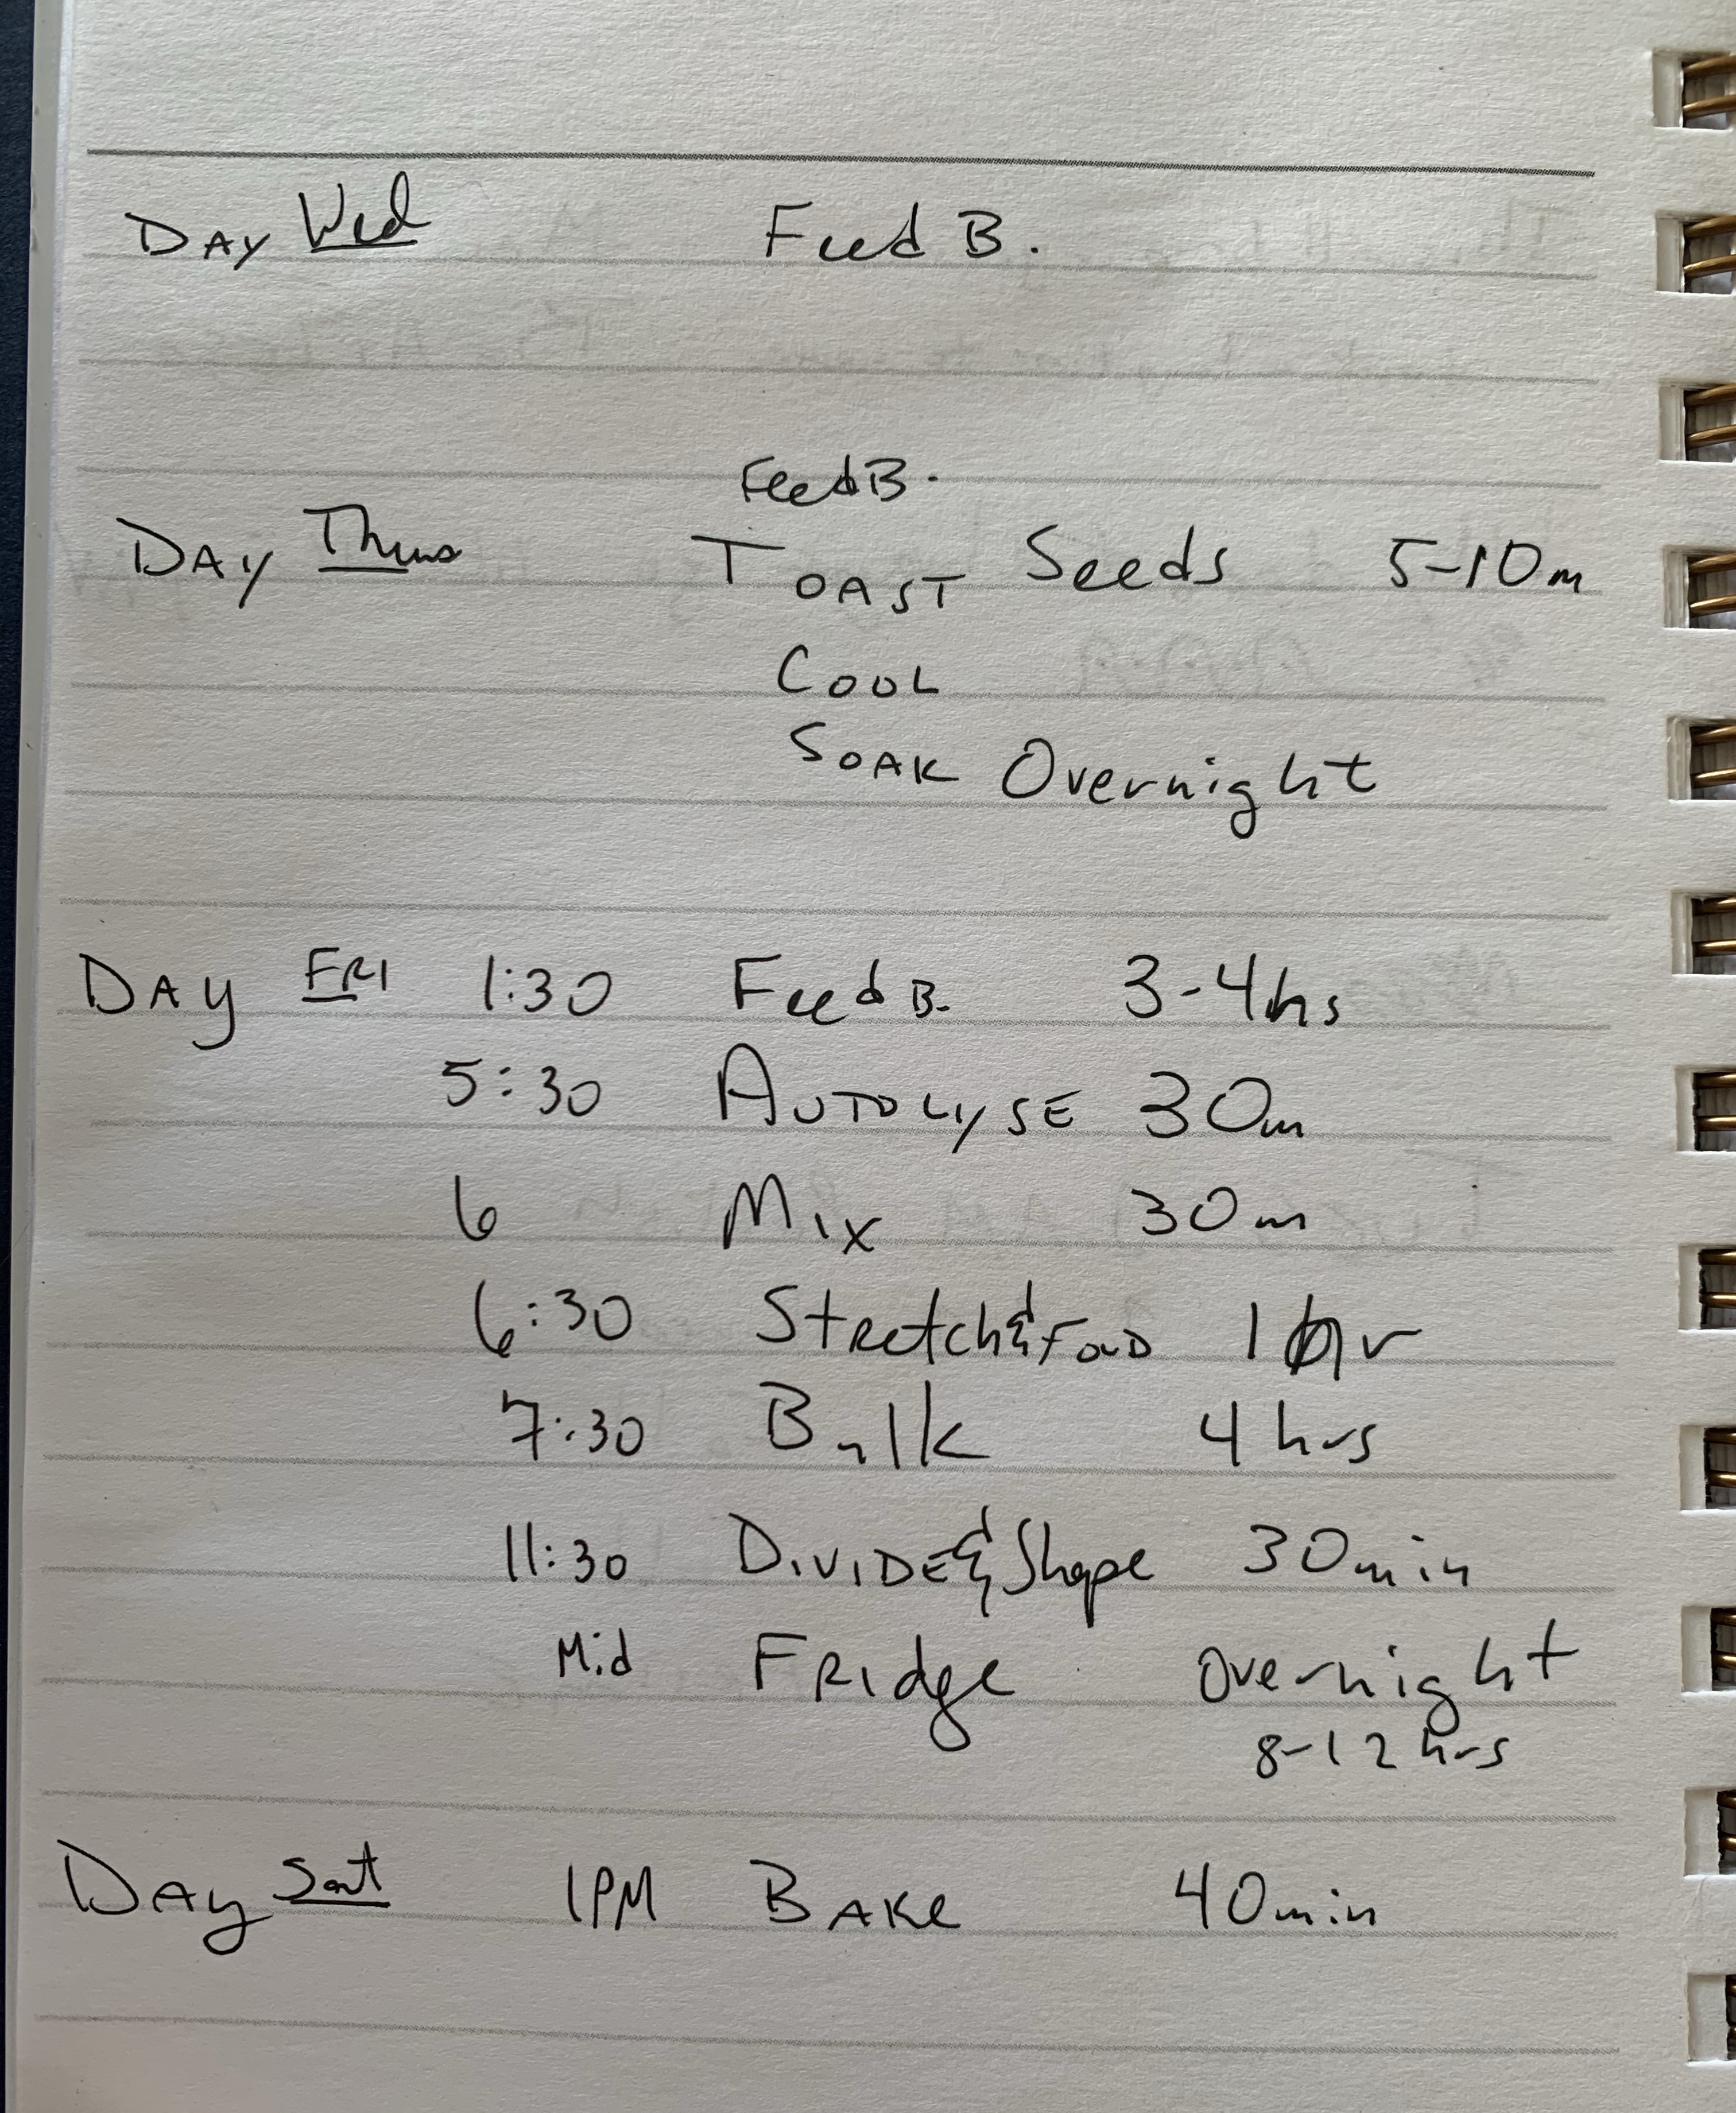
I have never worked with dough this wet. The recipe calls for 210g water for the seeds, 650g water for the initial dough, plus 50g water if it isn’t wet enough. This would be 91% hydration. I can’t imagine a scenario where the 50g is needed, so mine ended up being 86% hydration. That is incredibly high.
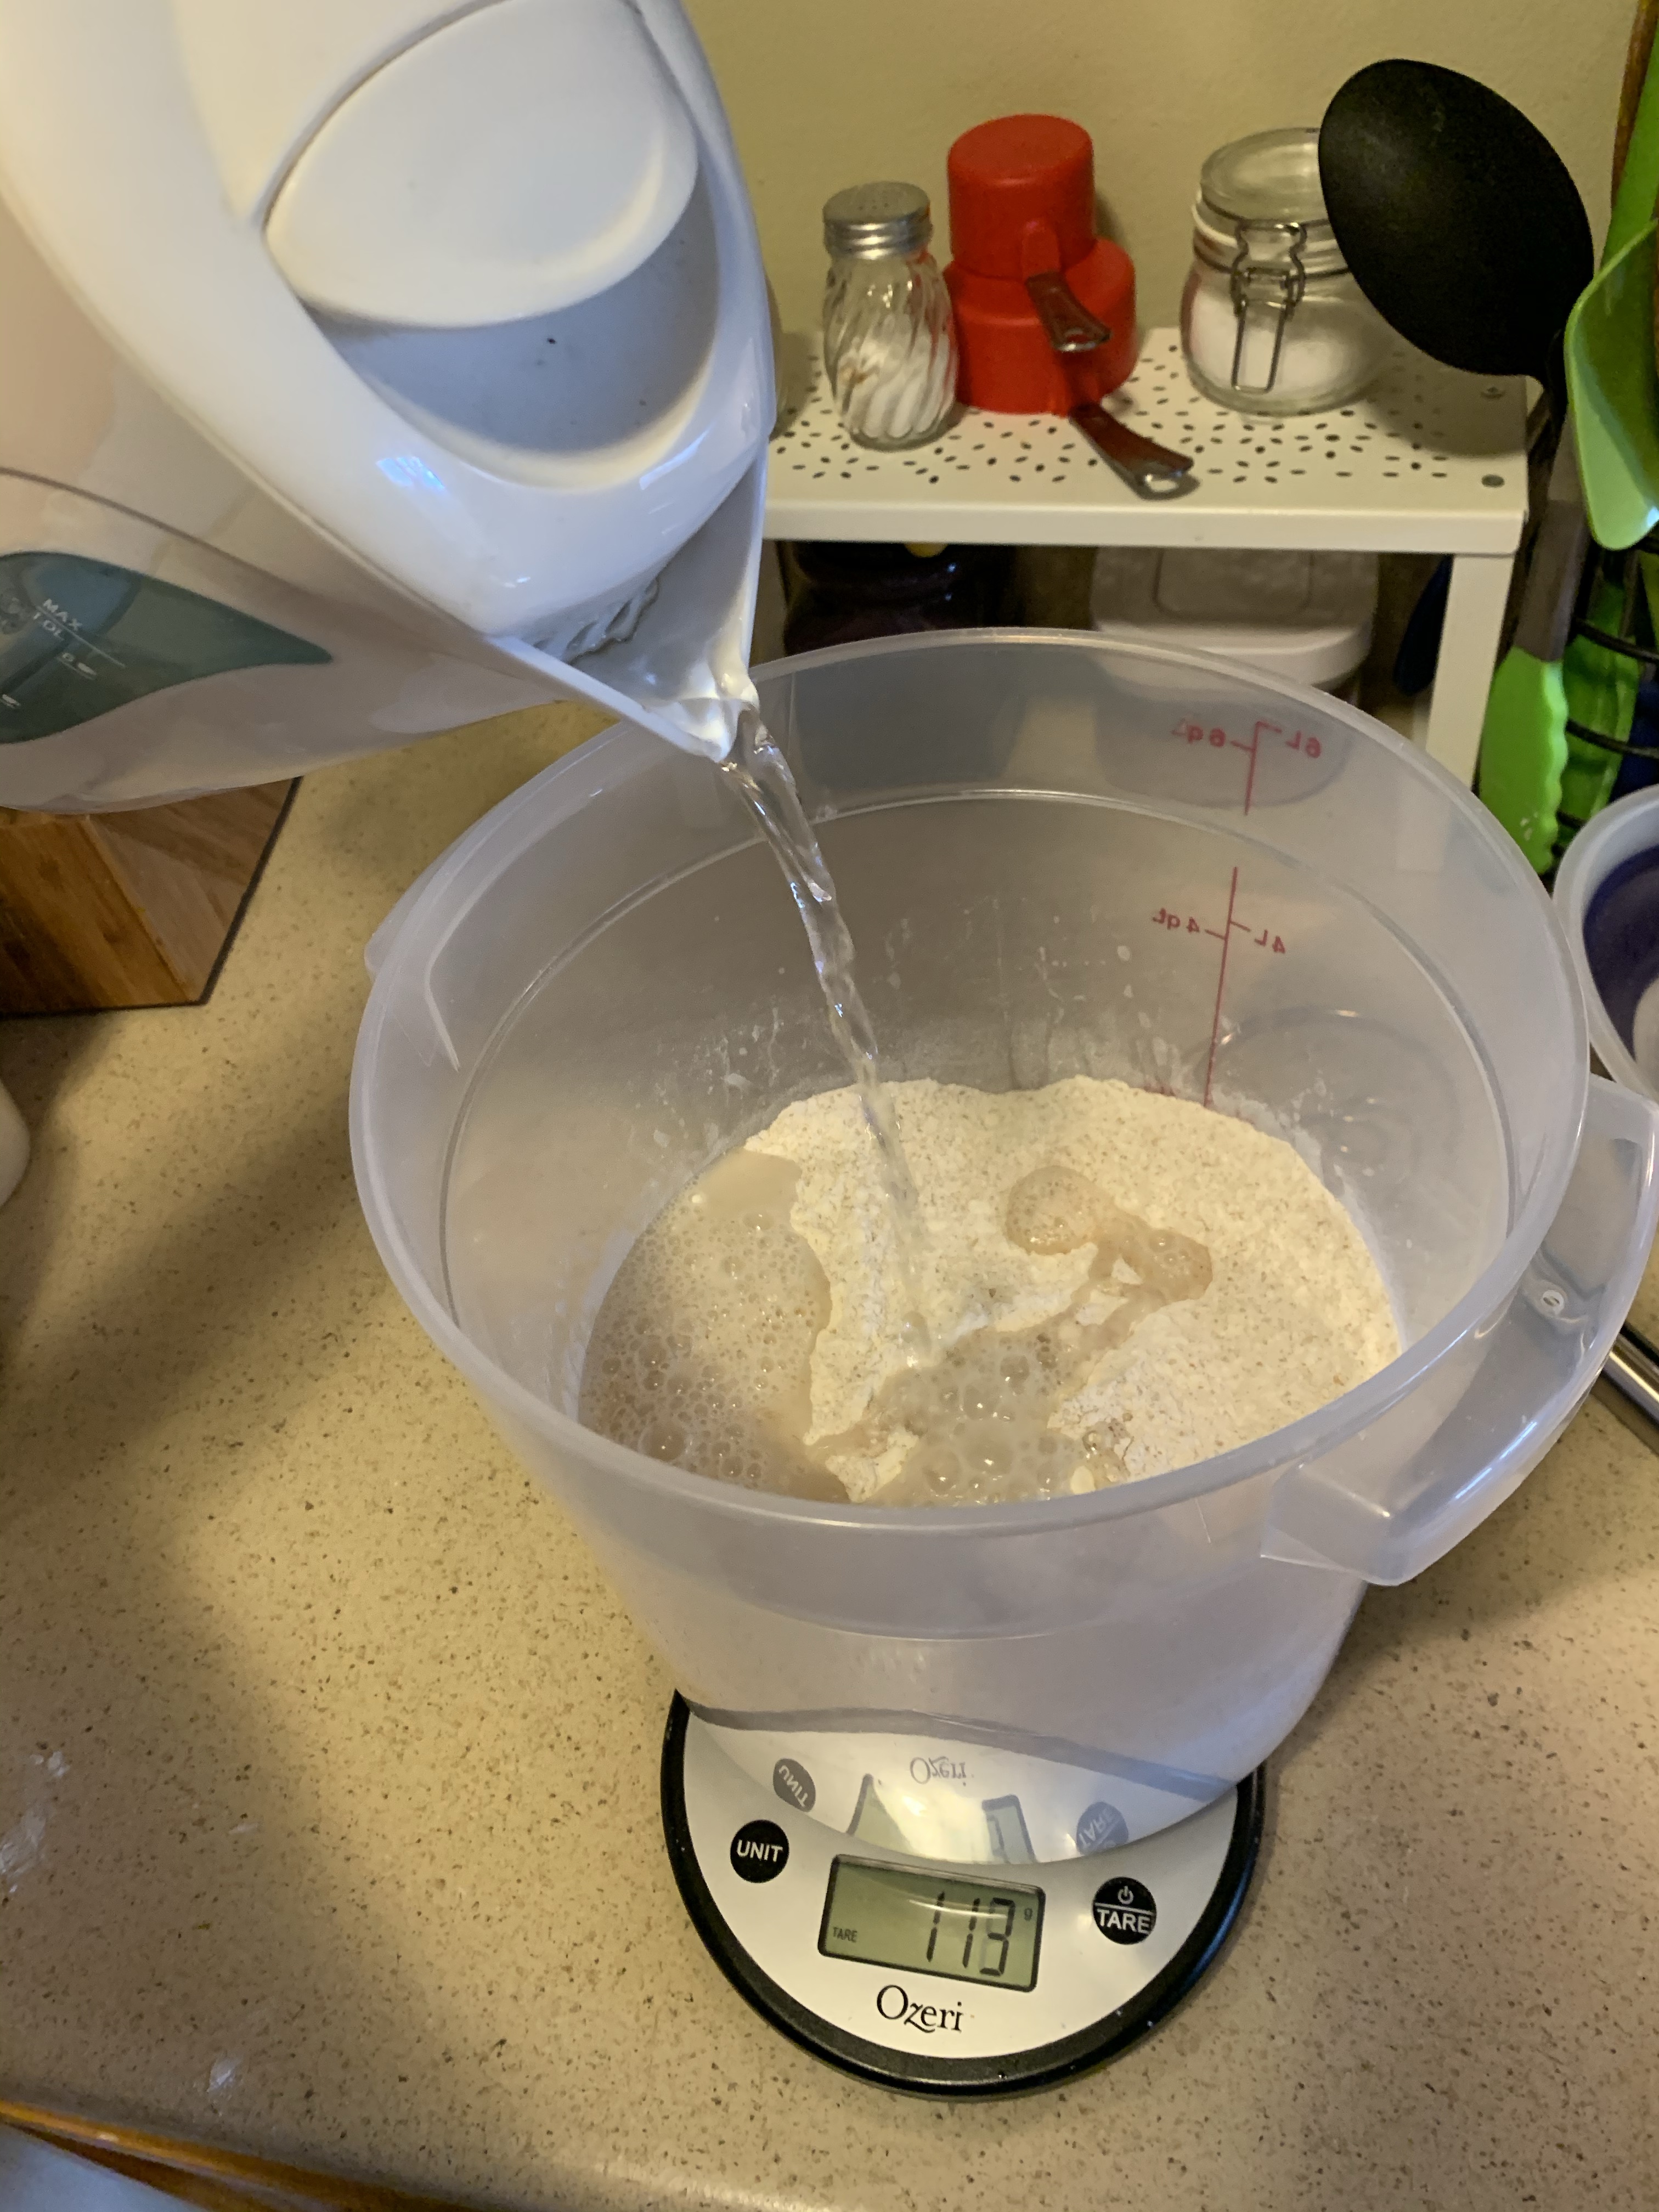
Perhaps there is some great benefit to having a liquid dough, and I’m sure better bakers can manipulate this level of hydration with aplomb. As for me and mine, it was mostly an anxiety inducing pain in the neck. Nevertheless, I read some high hydration dough tips online and gained confidence. I have done this many times before, it’s just been a while.
Toasty Seed Uncertainty
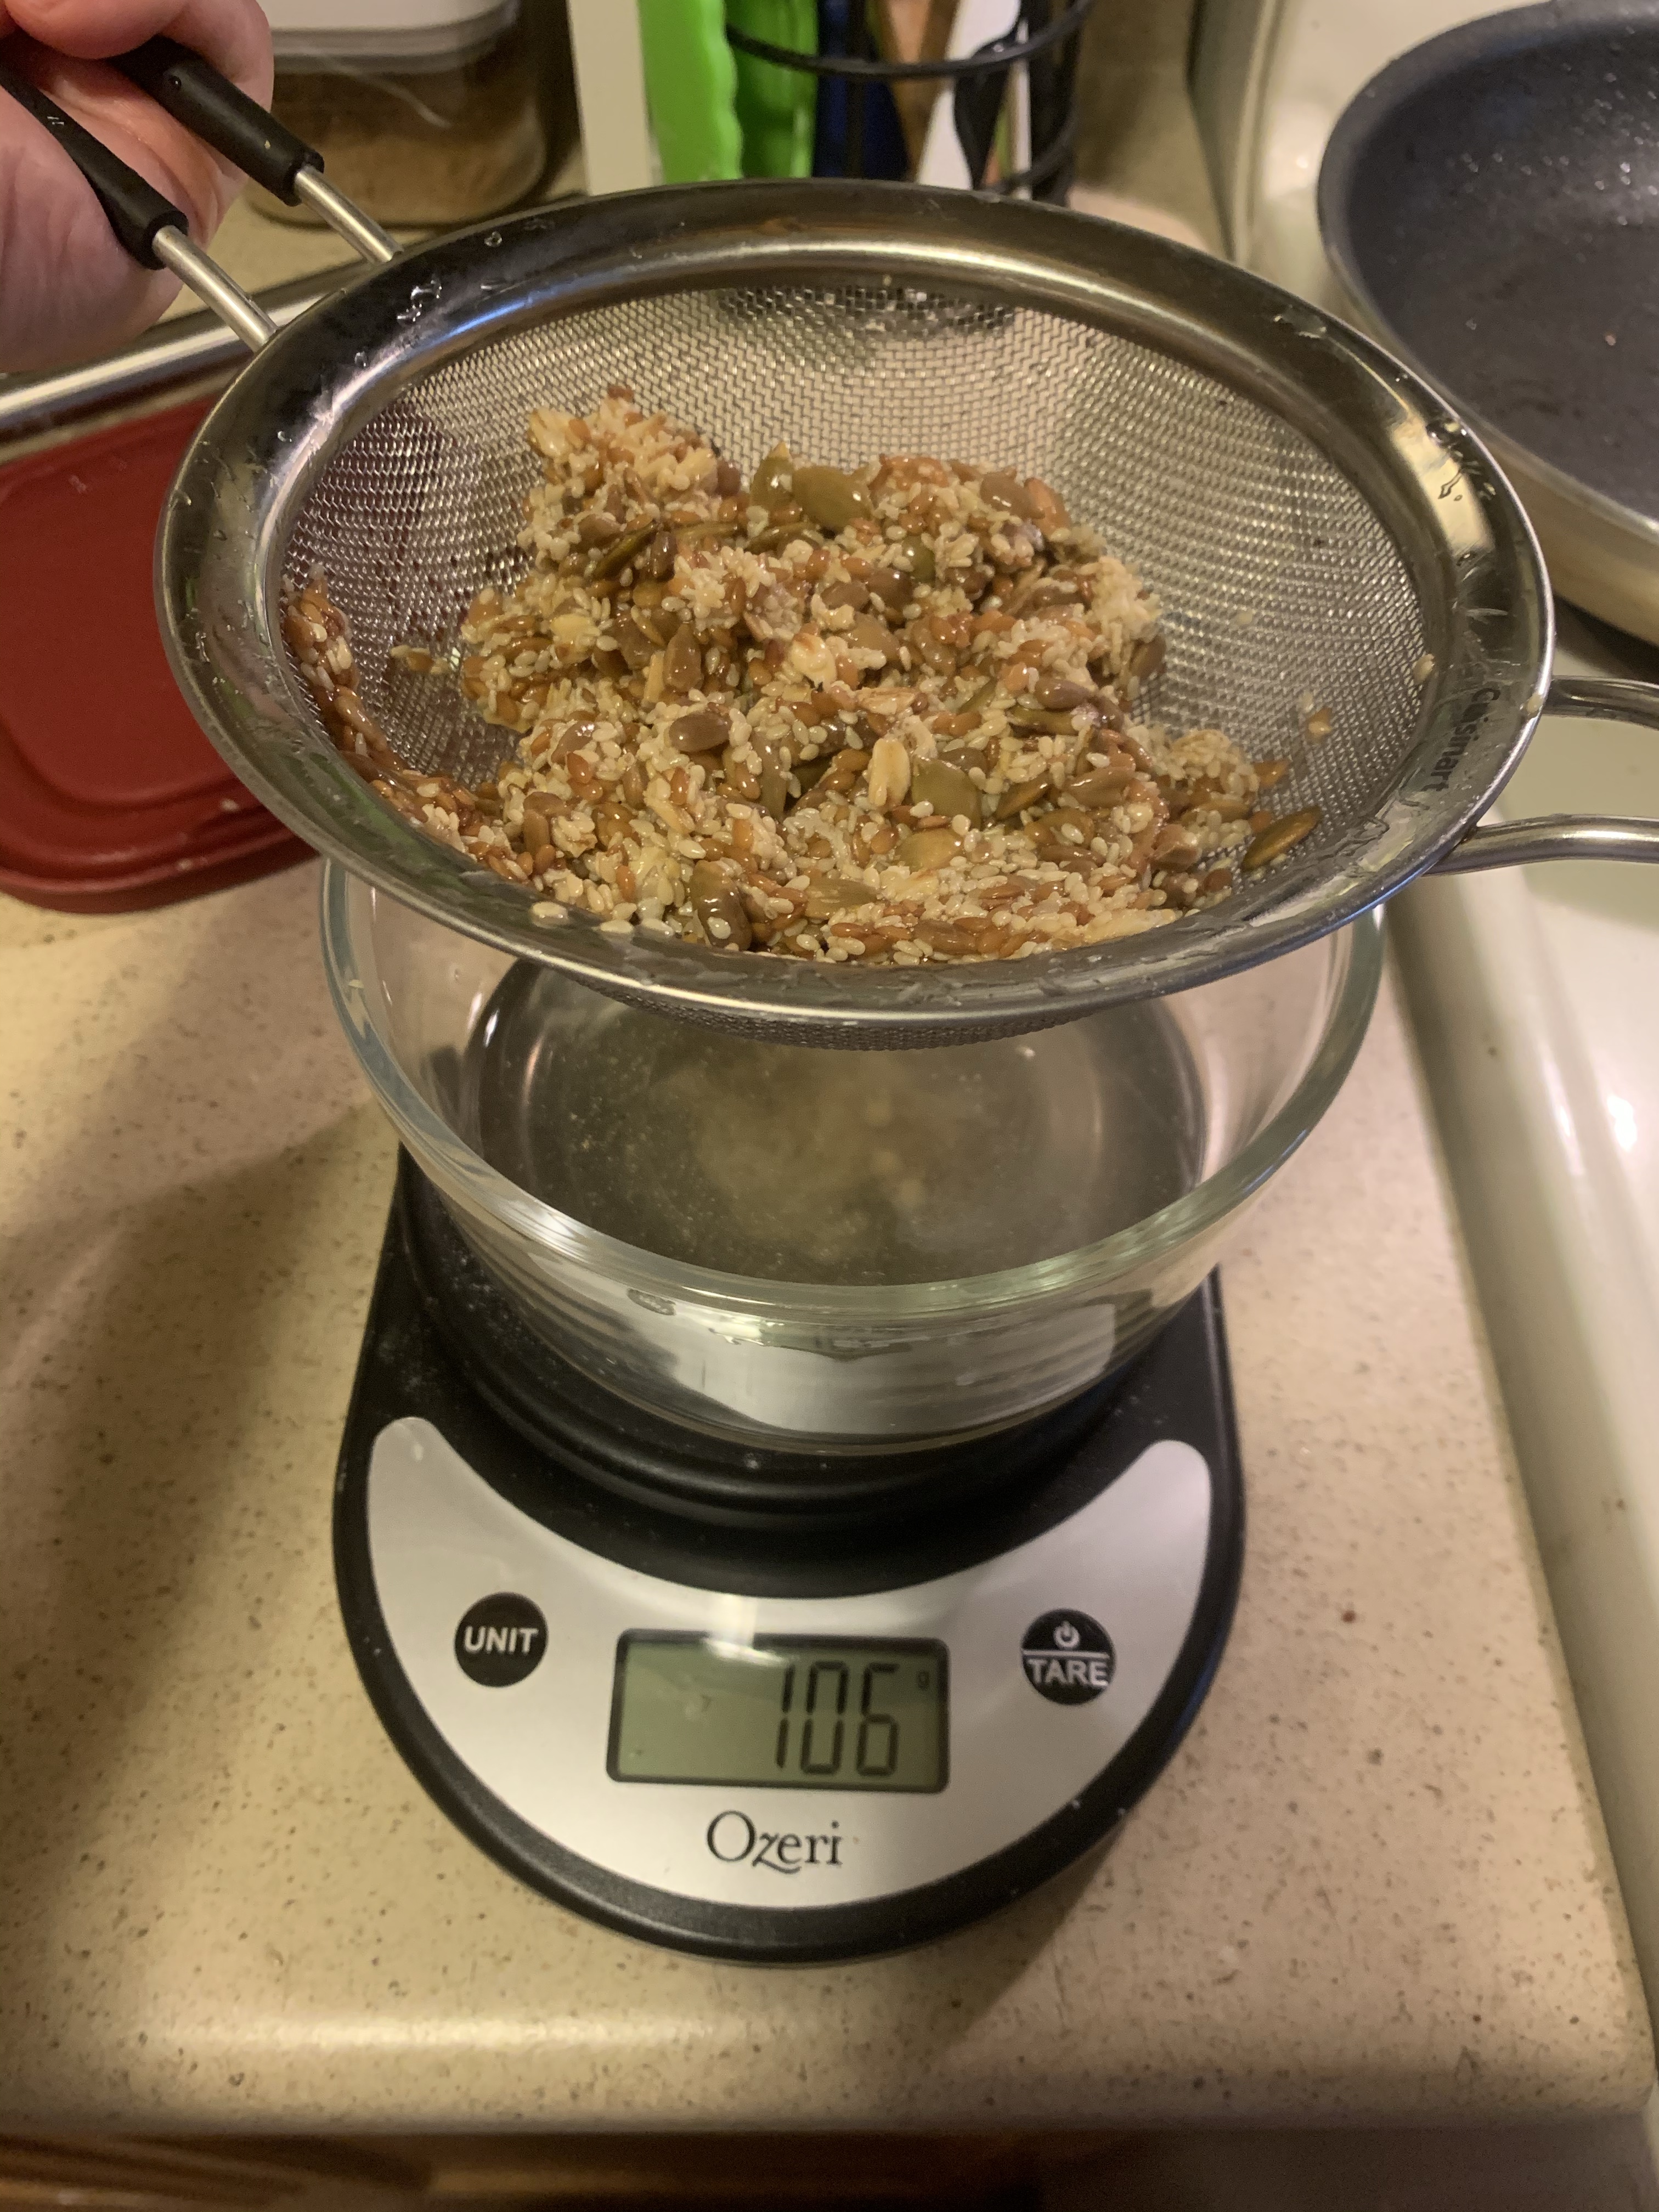
After soaking the seeds in water overnight, I used a strainer and a bowl to drain off the thick, syrupy liquid. When mixed into dough, this filled the kitchen with a seedy, nutty scent before any seeds were added.
The recipe only calls for two folds, but the loose consistency of the dough compelled me to fold it a third time. I think it may have needed more folds; perhaps four within the first two hours.

When the time came for shaping, I preshaped it for a 20 minute bench rest to encourage structural integrity. It didn’t totally flatten out after this rest, so I went ahead with the final shaping and put them in bannetons overnight.
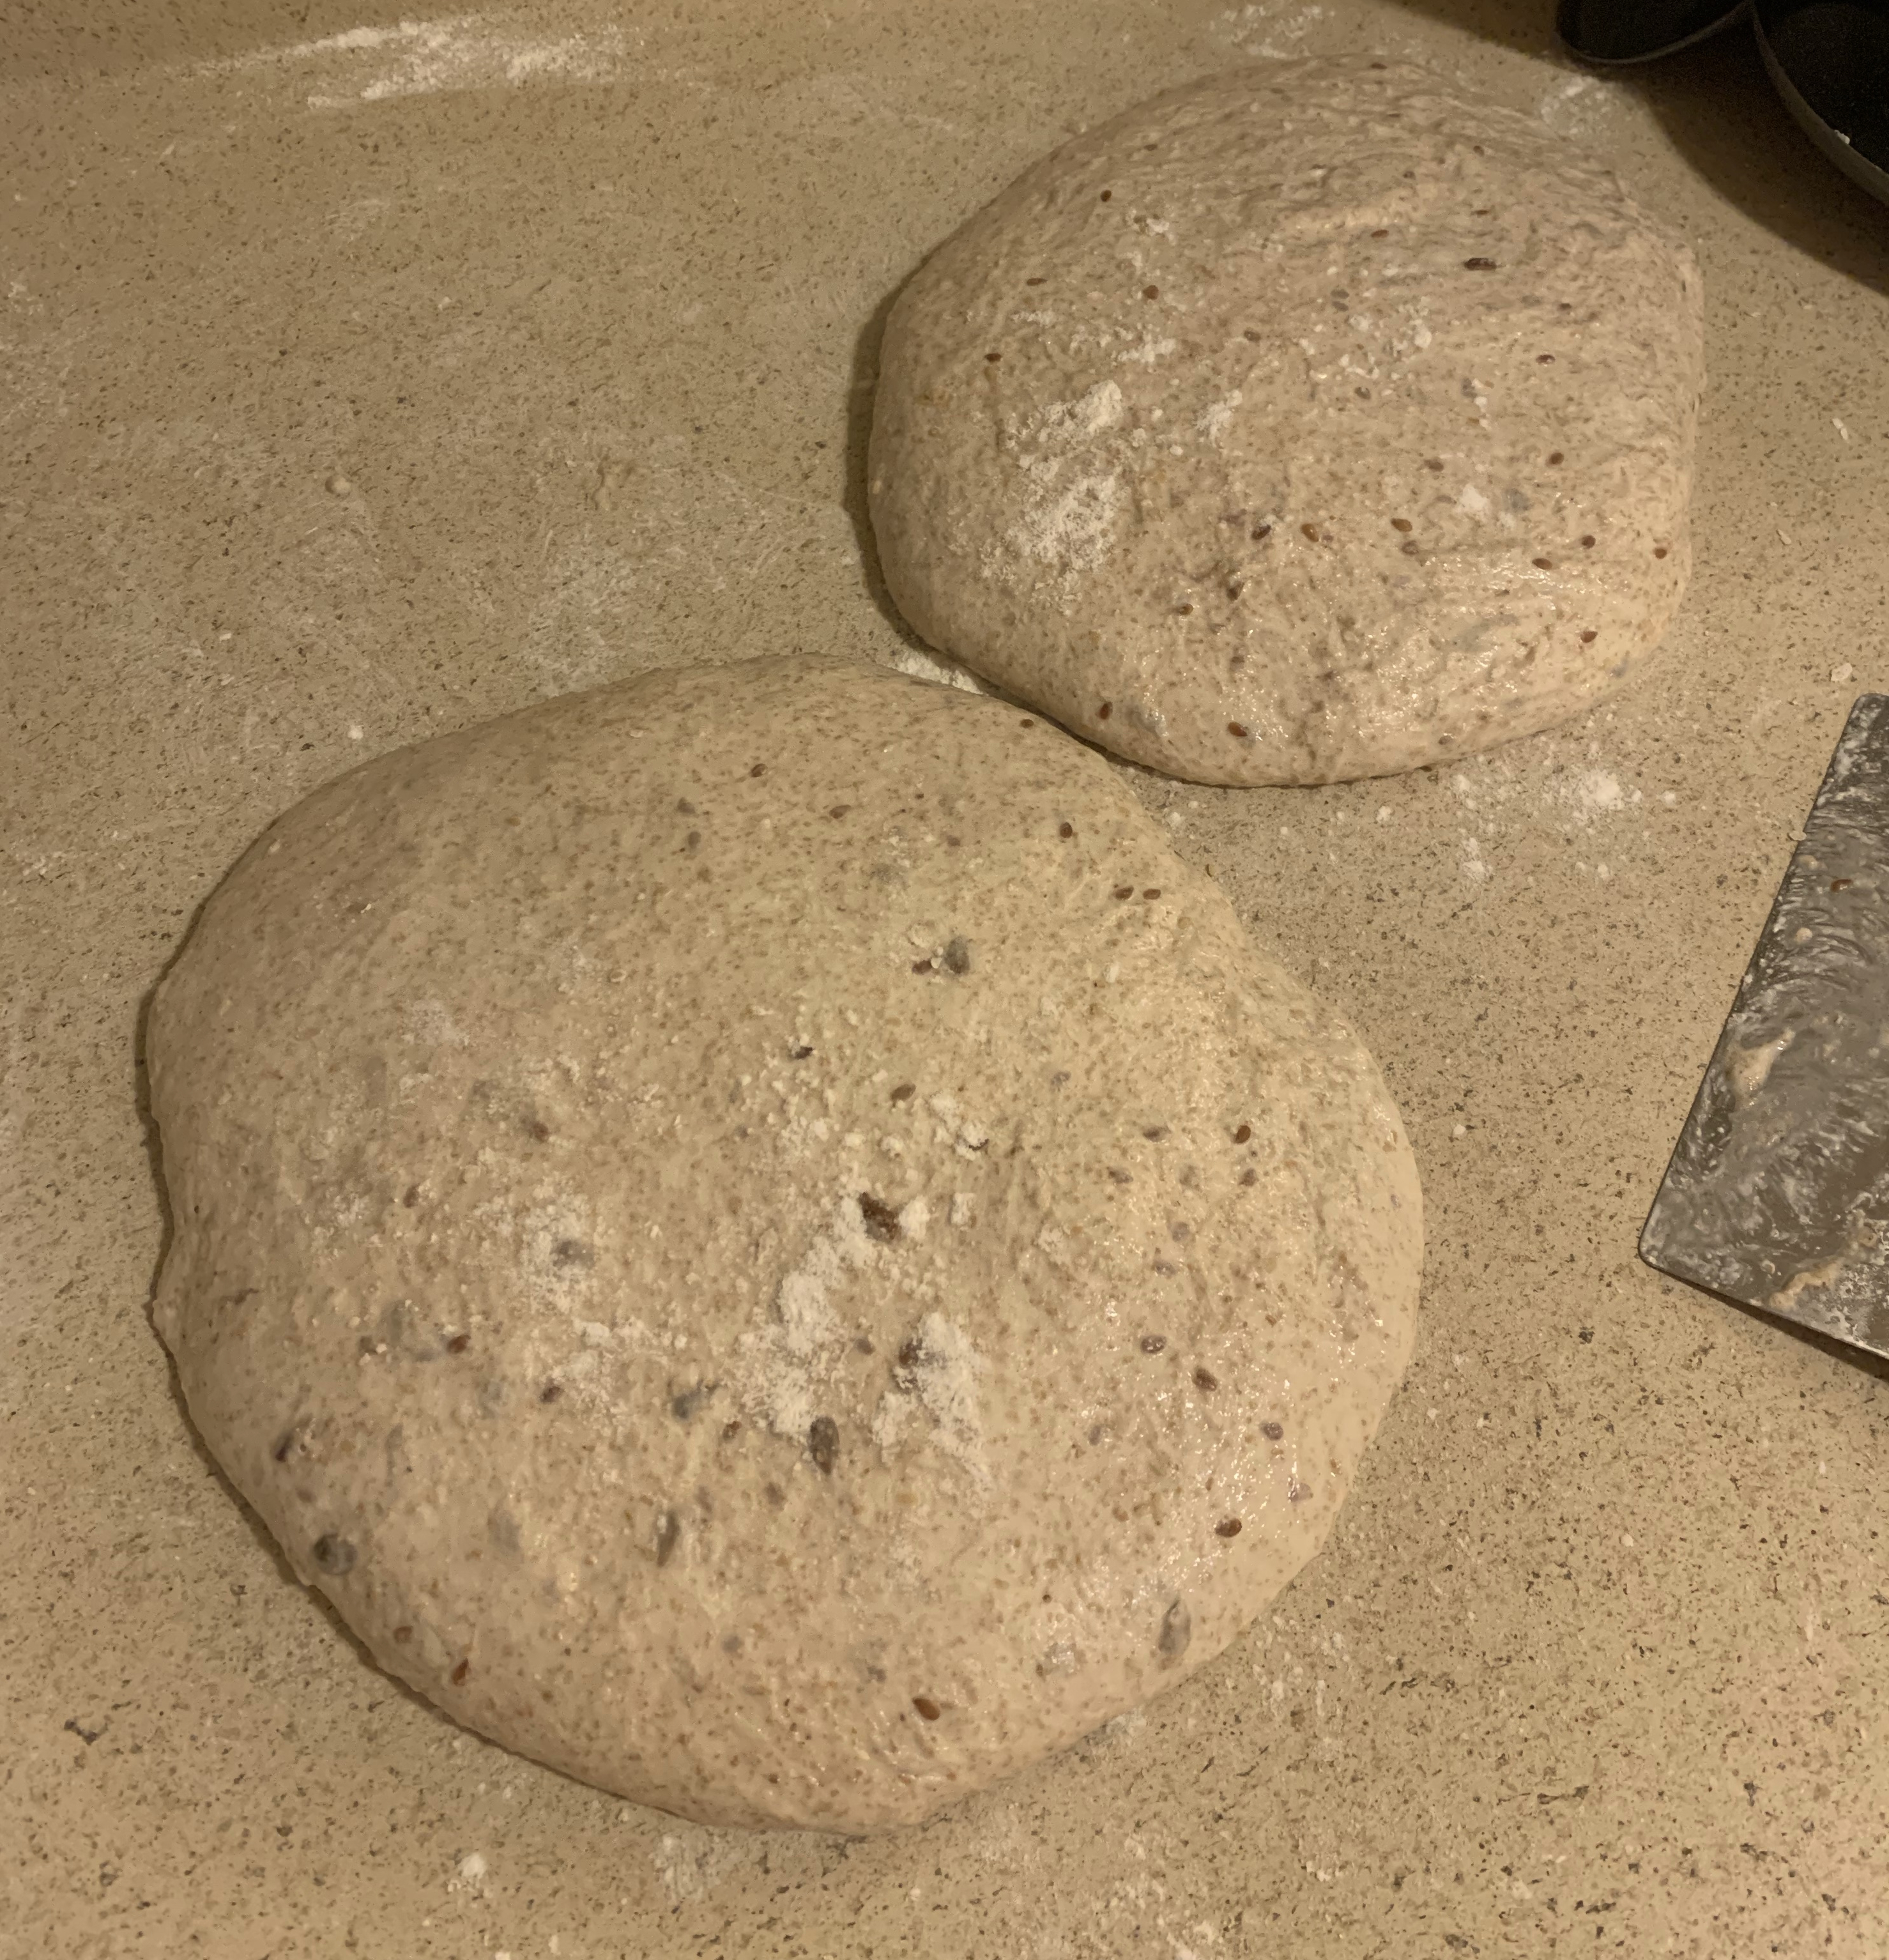
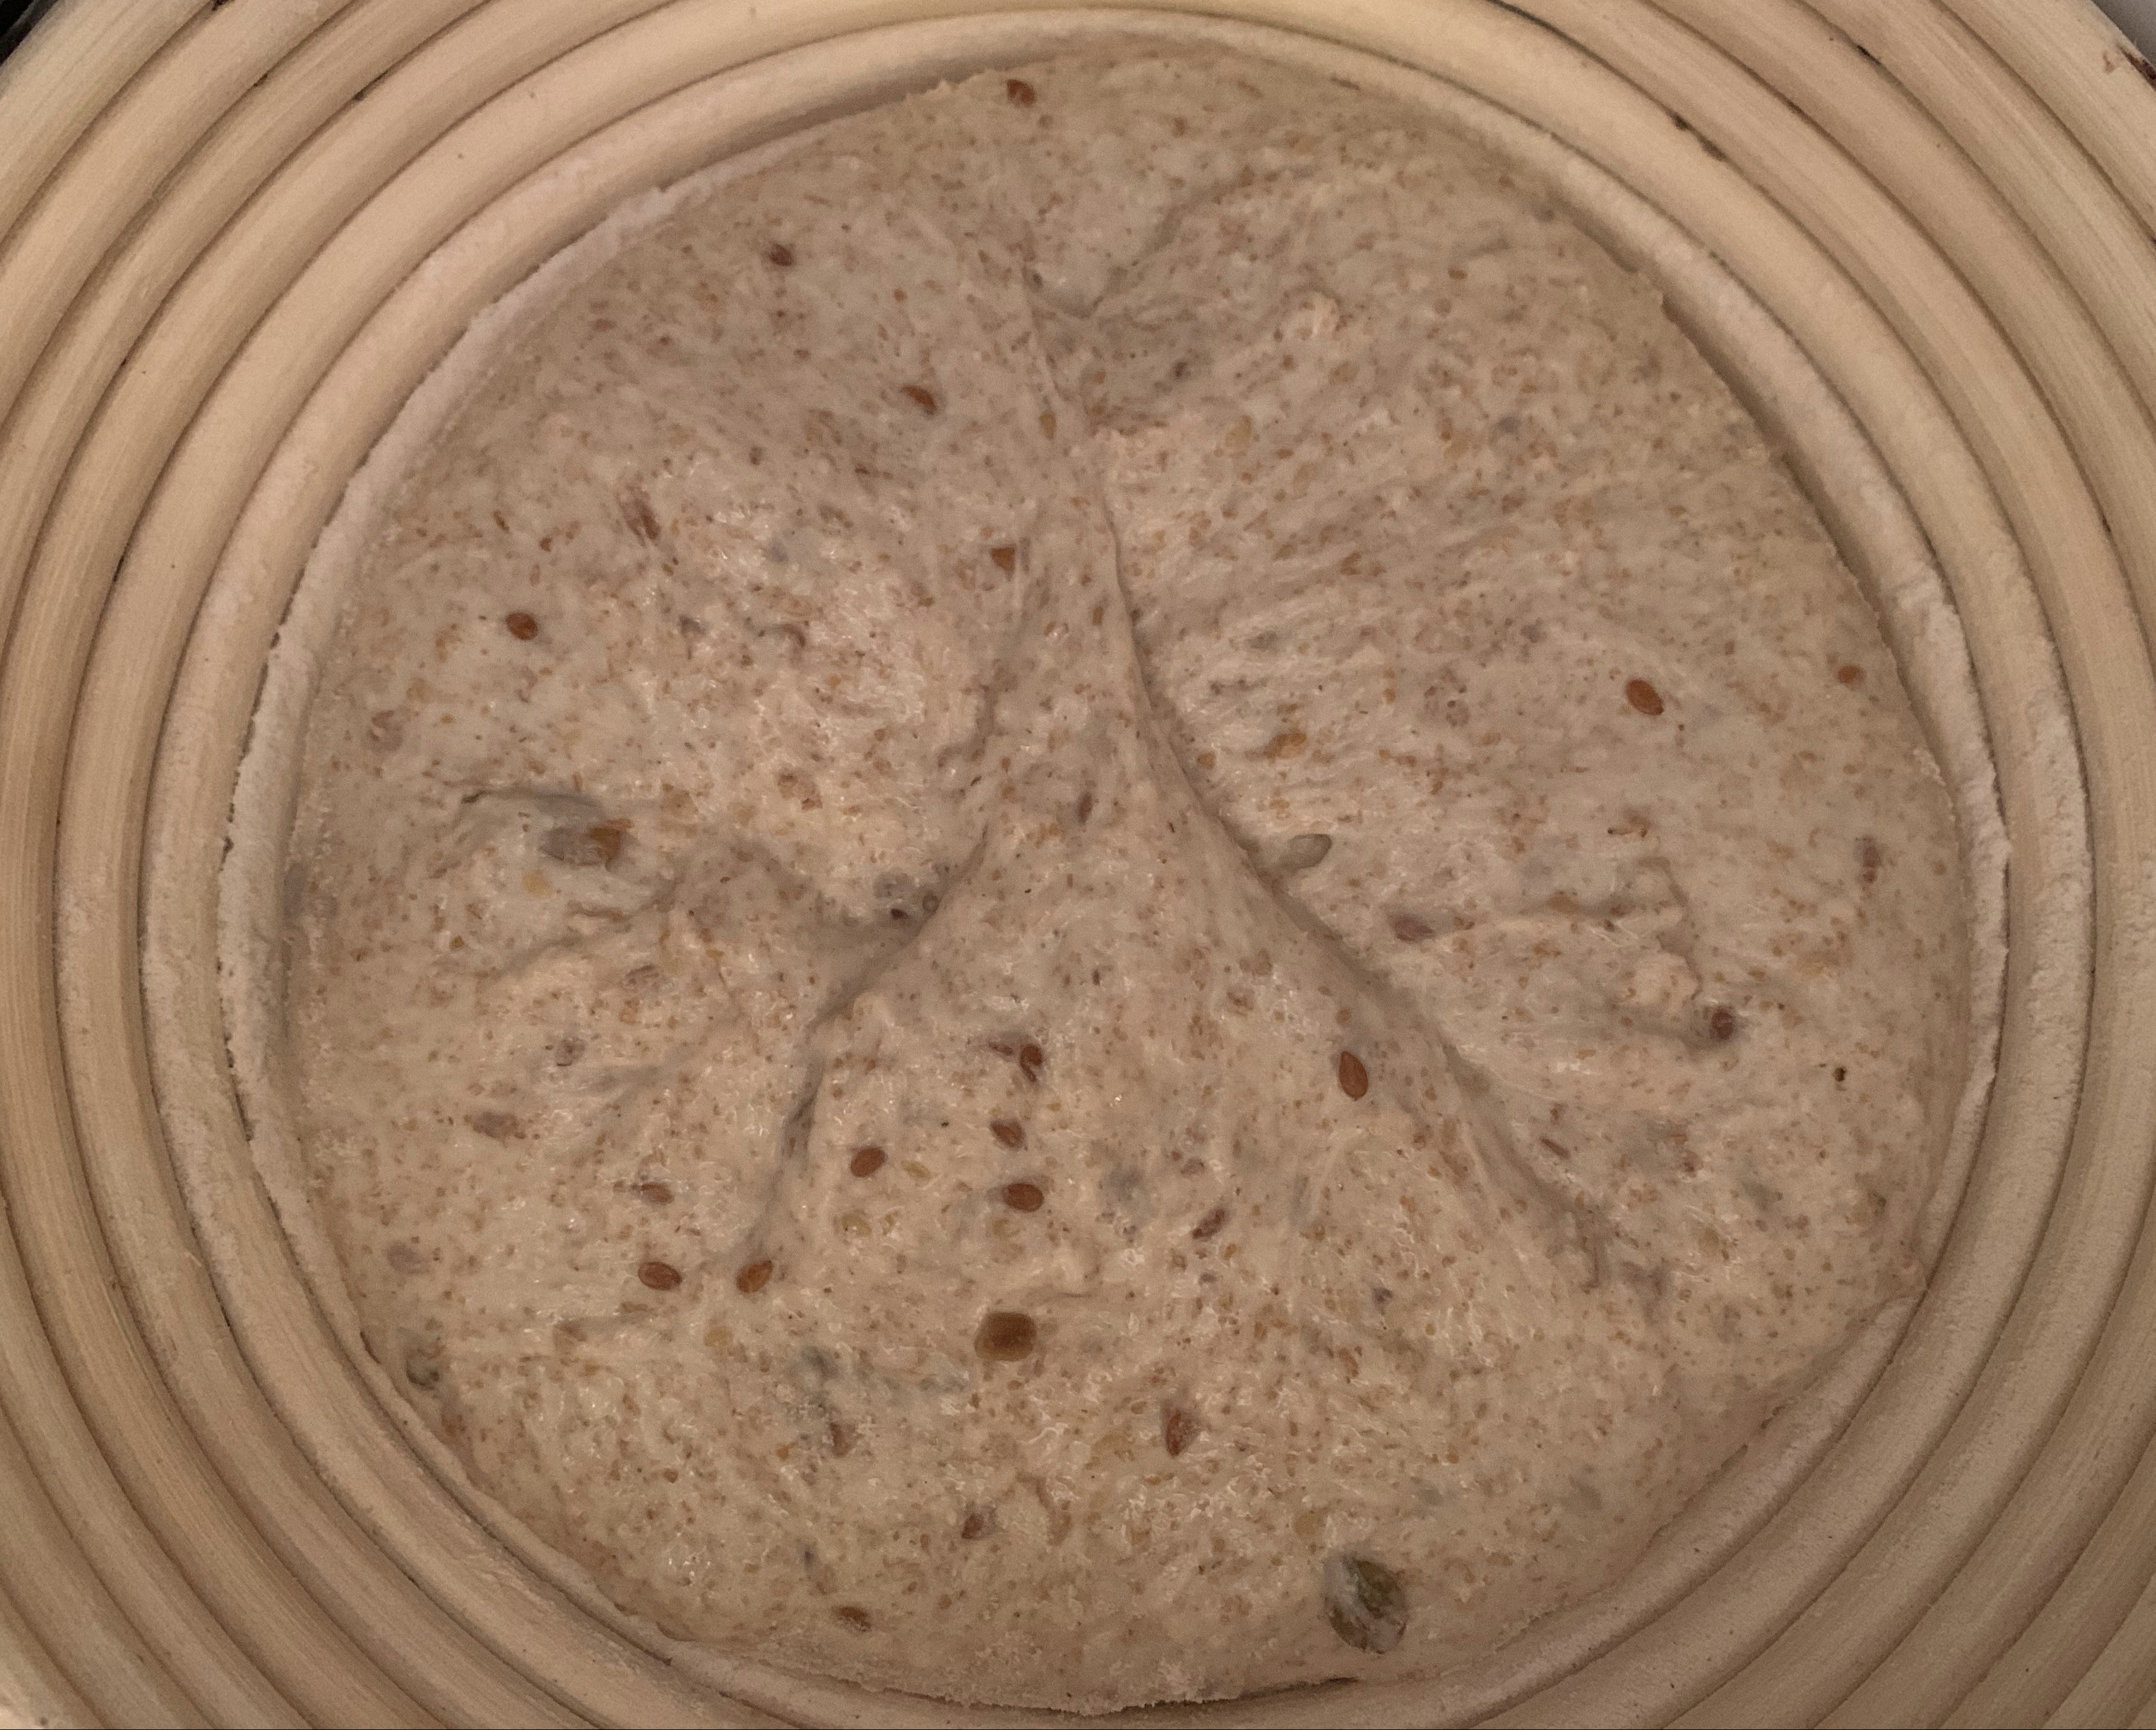
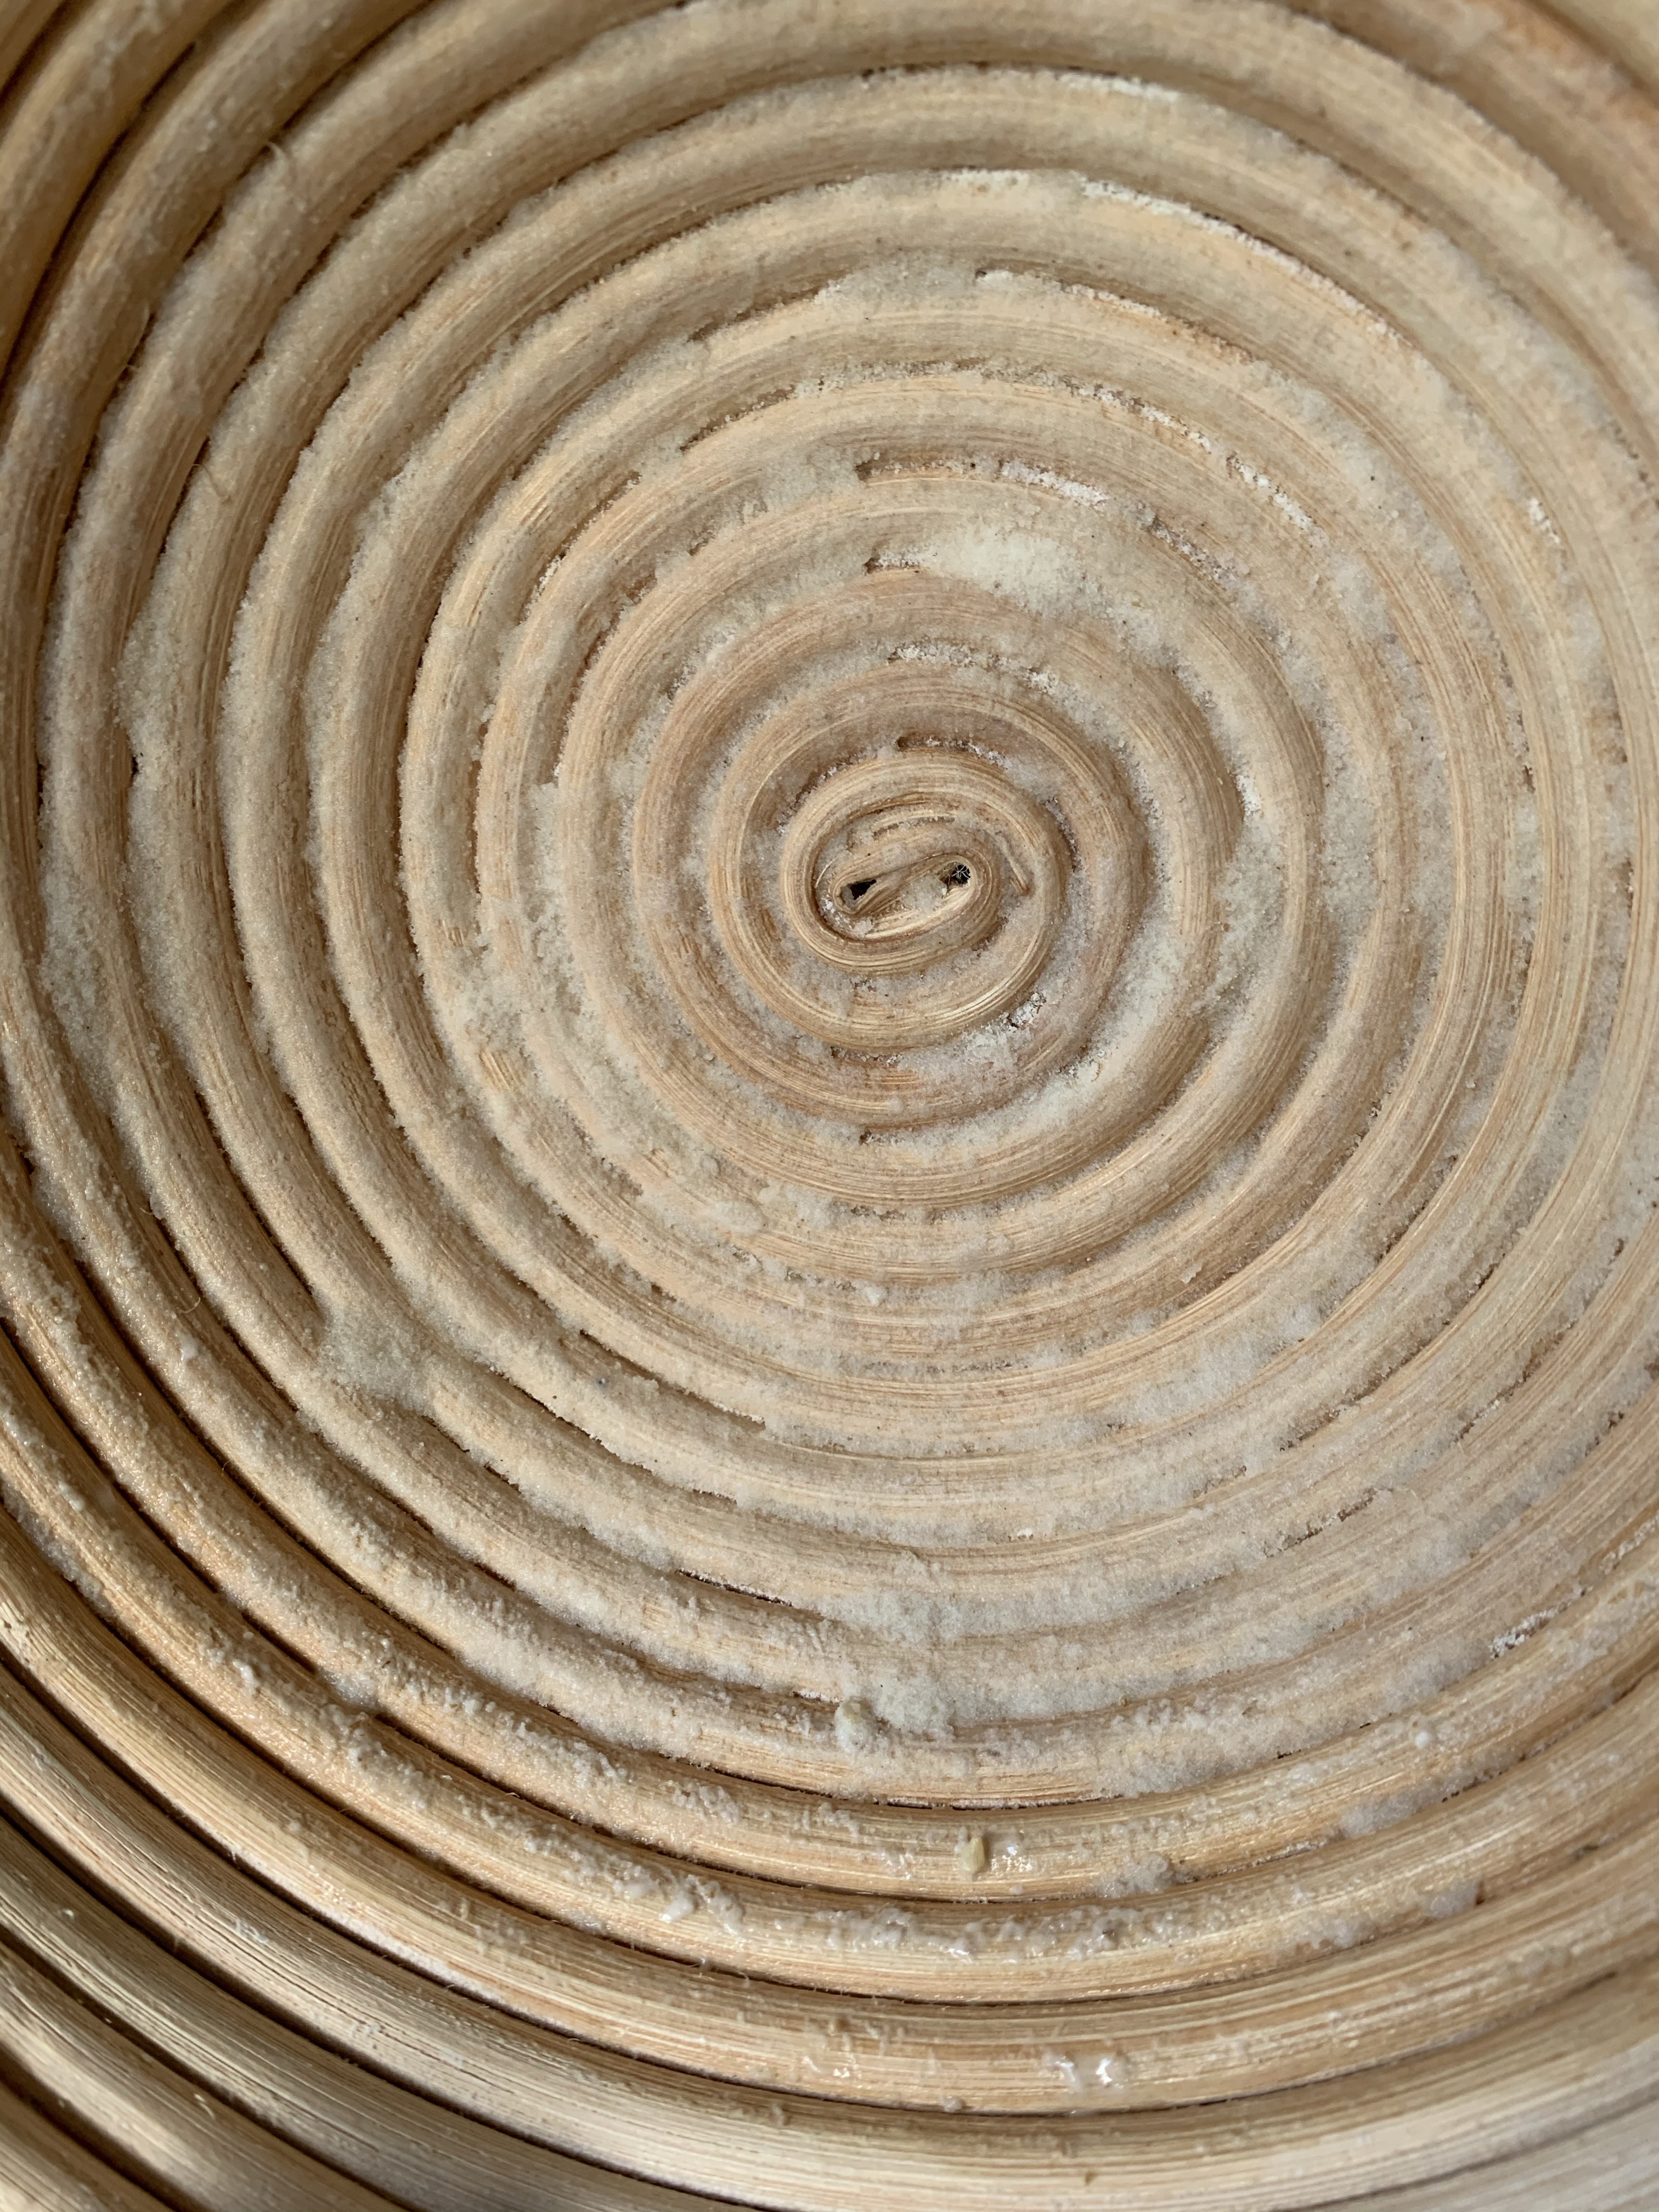
Like always, I used brown rice flour to prepare the bannetons for shaping. Unlike always, the dough was so wet it leached out during proofing. Instead of brushing off easily, this flour was wet goo when I removed the loaves after proofing. I was amazed (and a little grossed out).
If I had this to do again, I would use only 550g in the initial dough, and I would still add the seed-soaked liquid. I would only add more water if the dough was particularly dry.
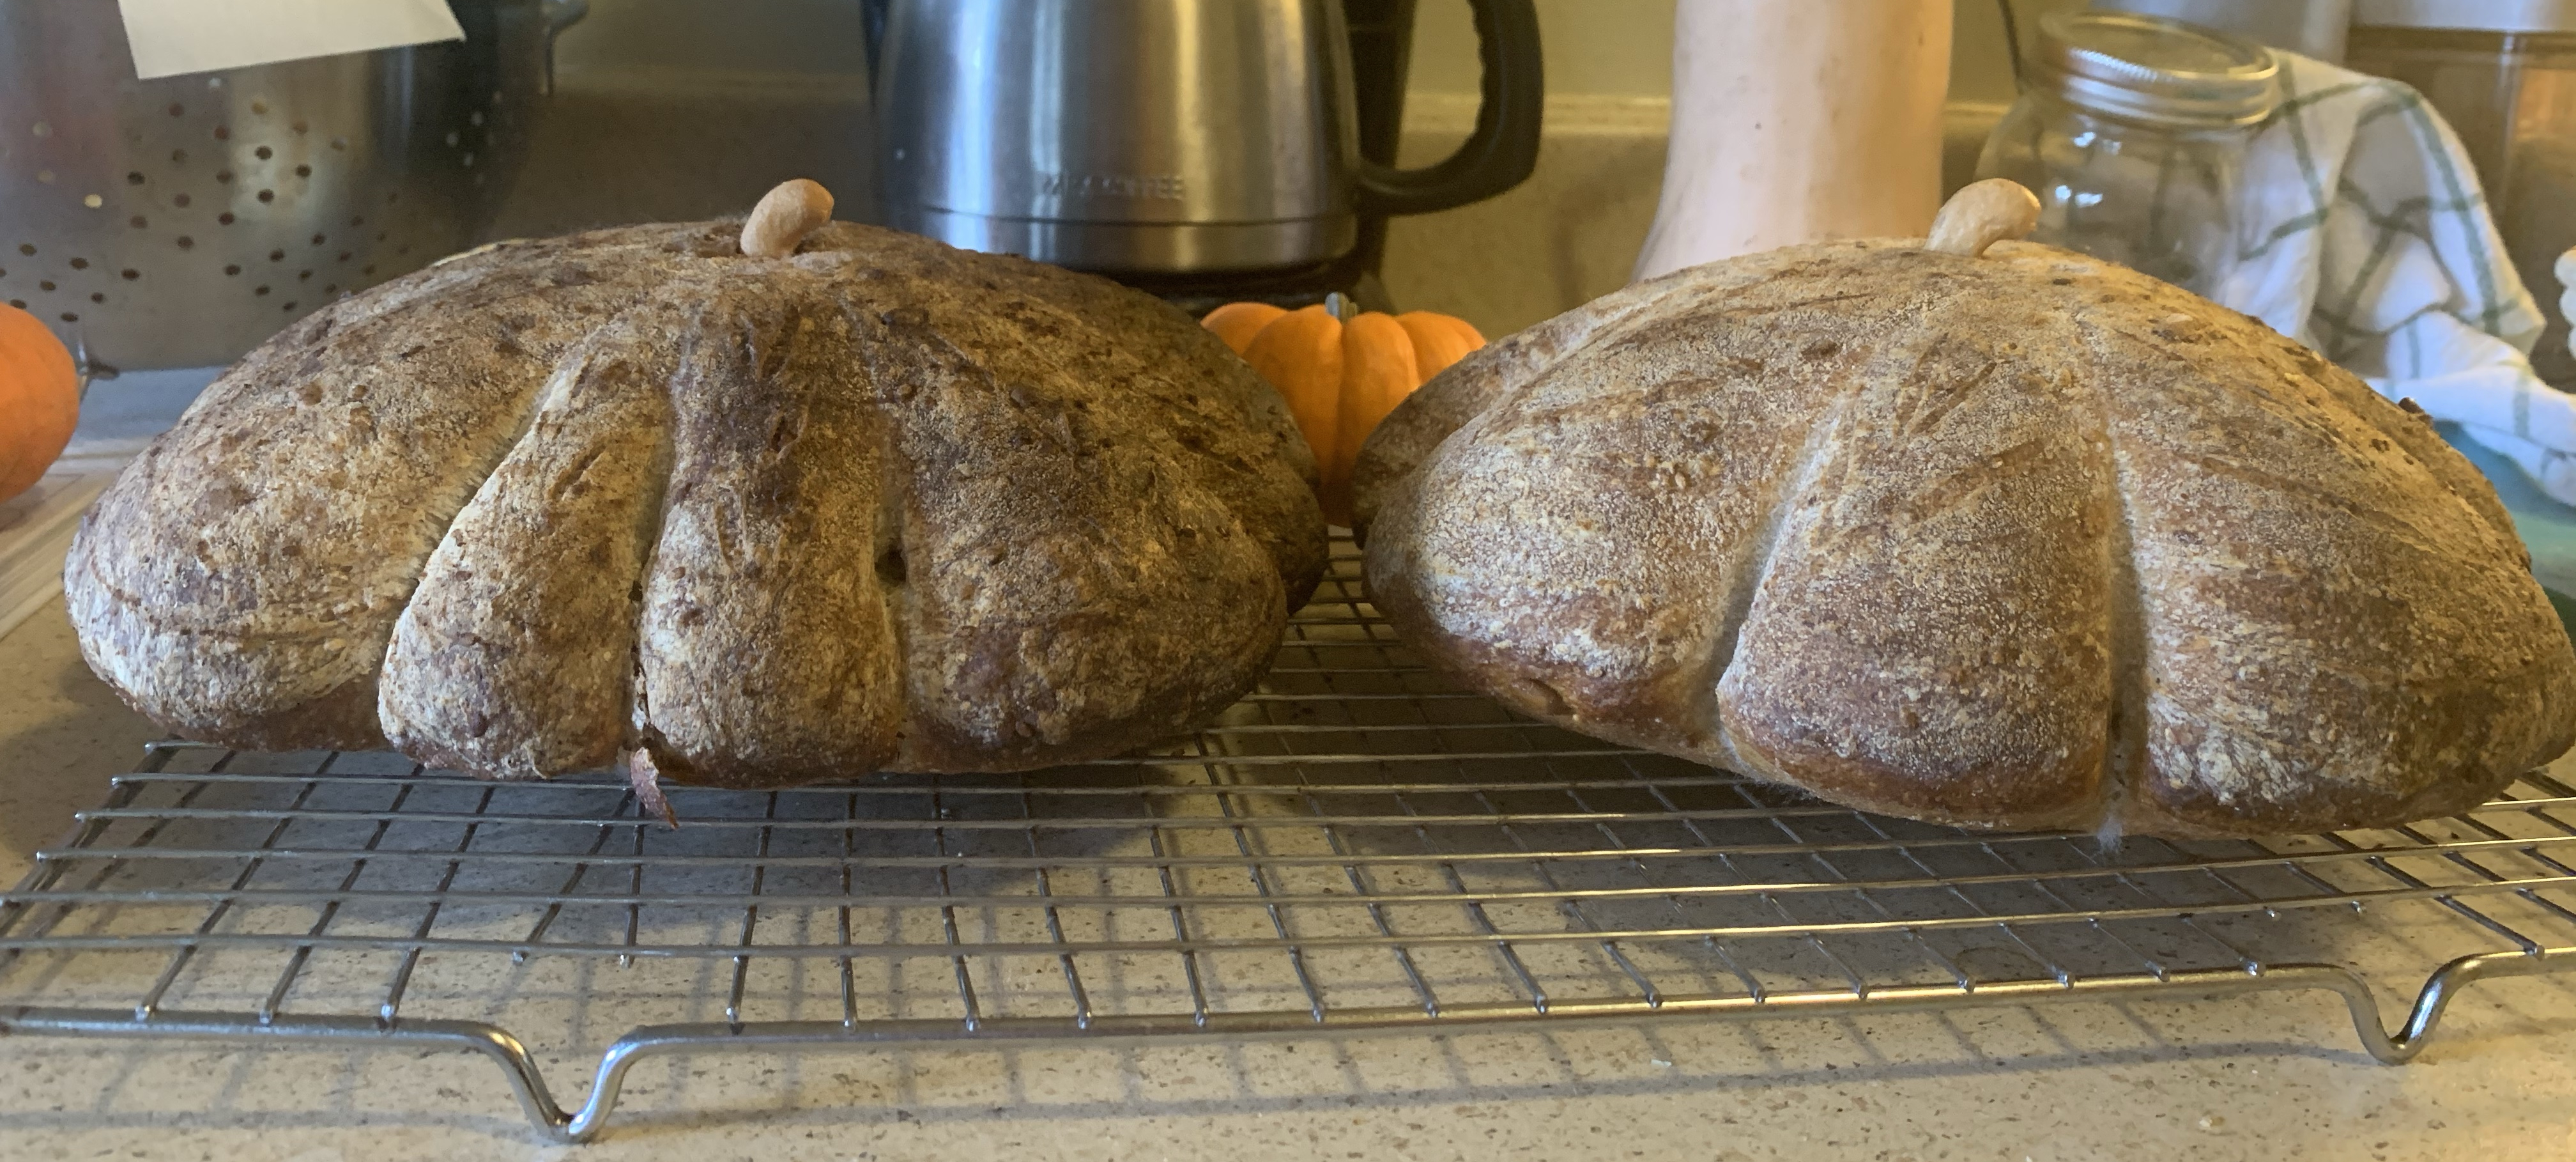
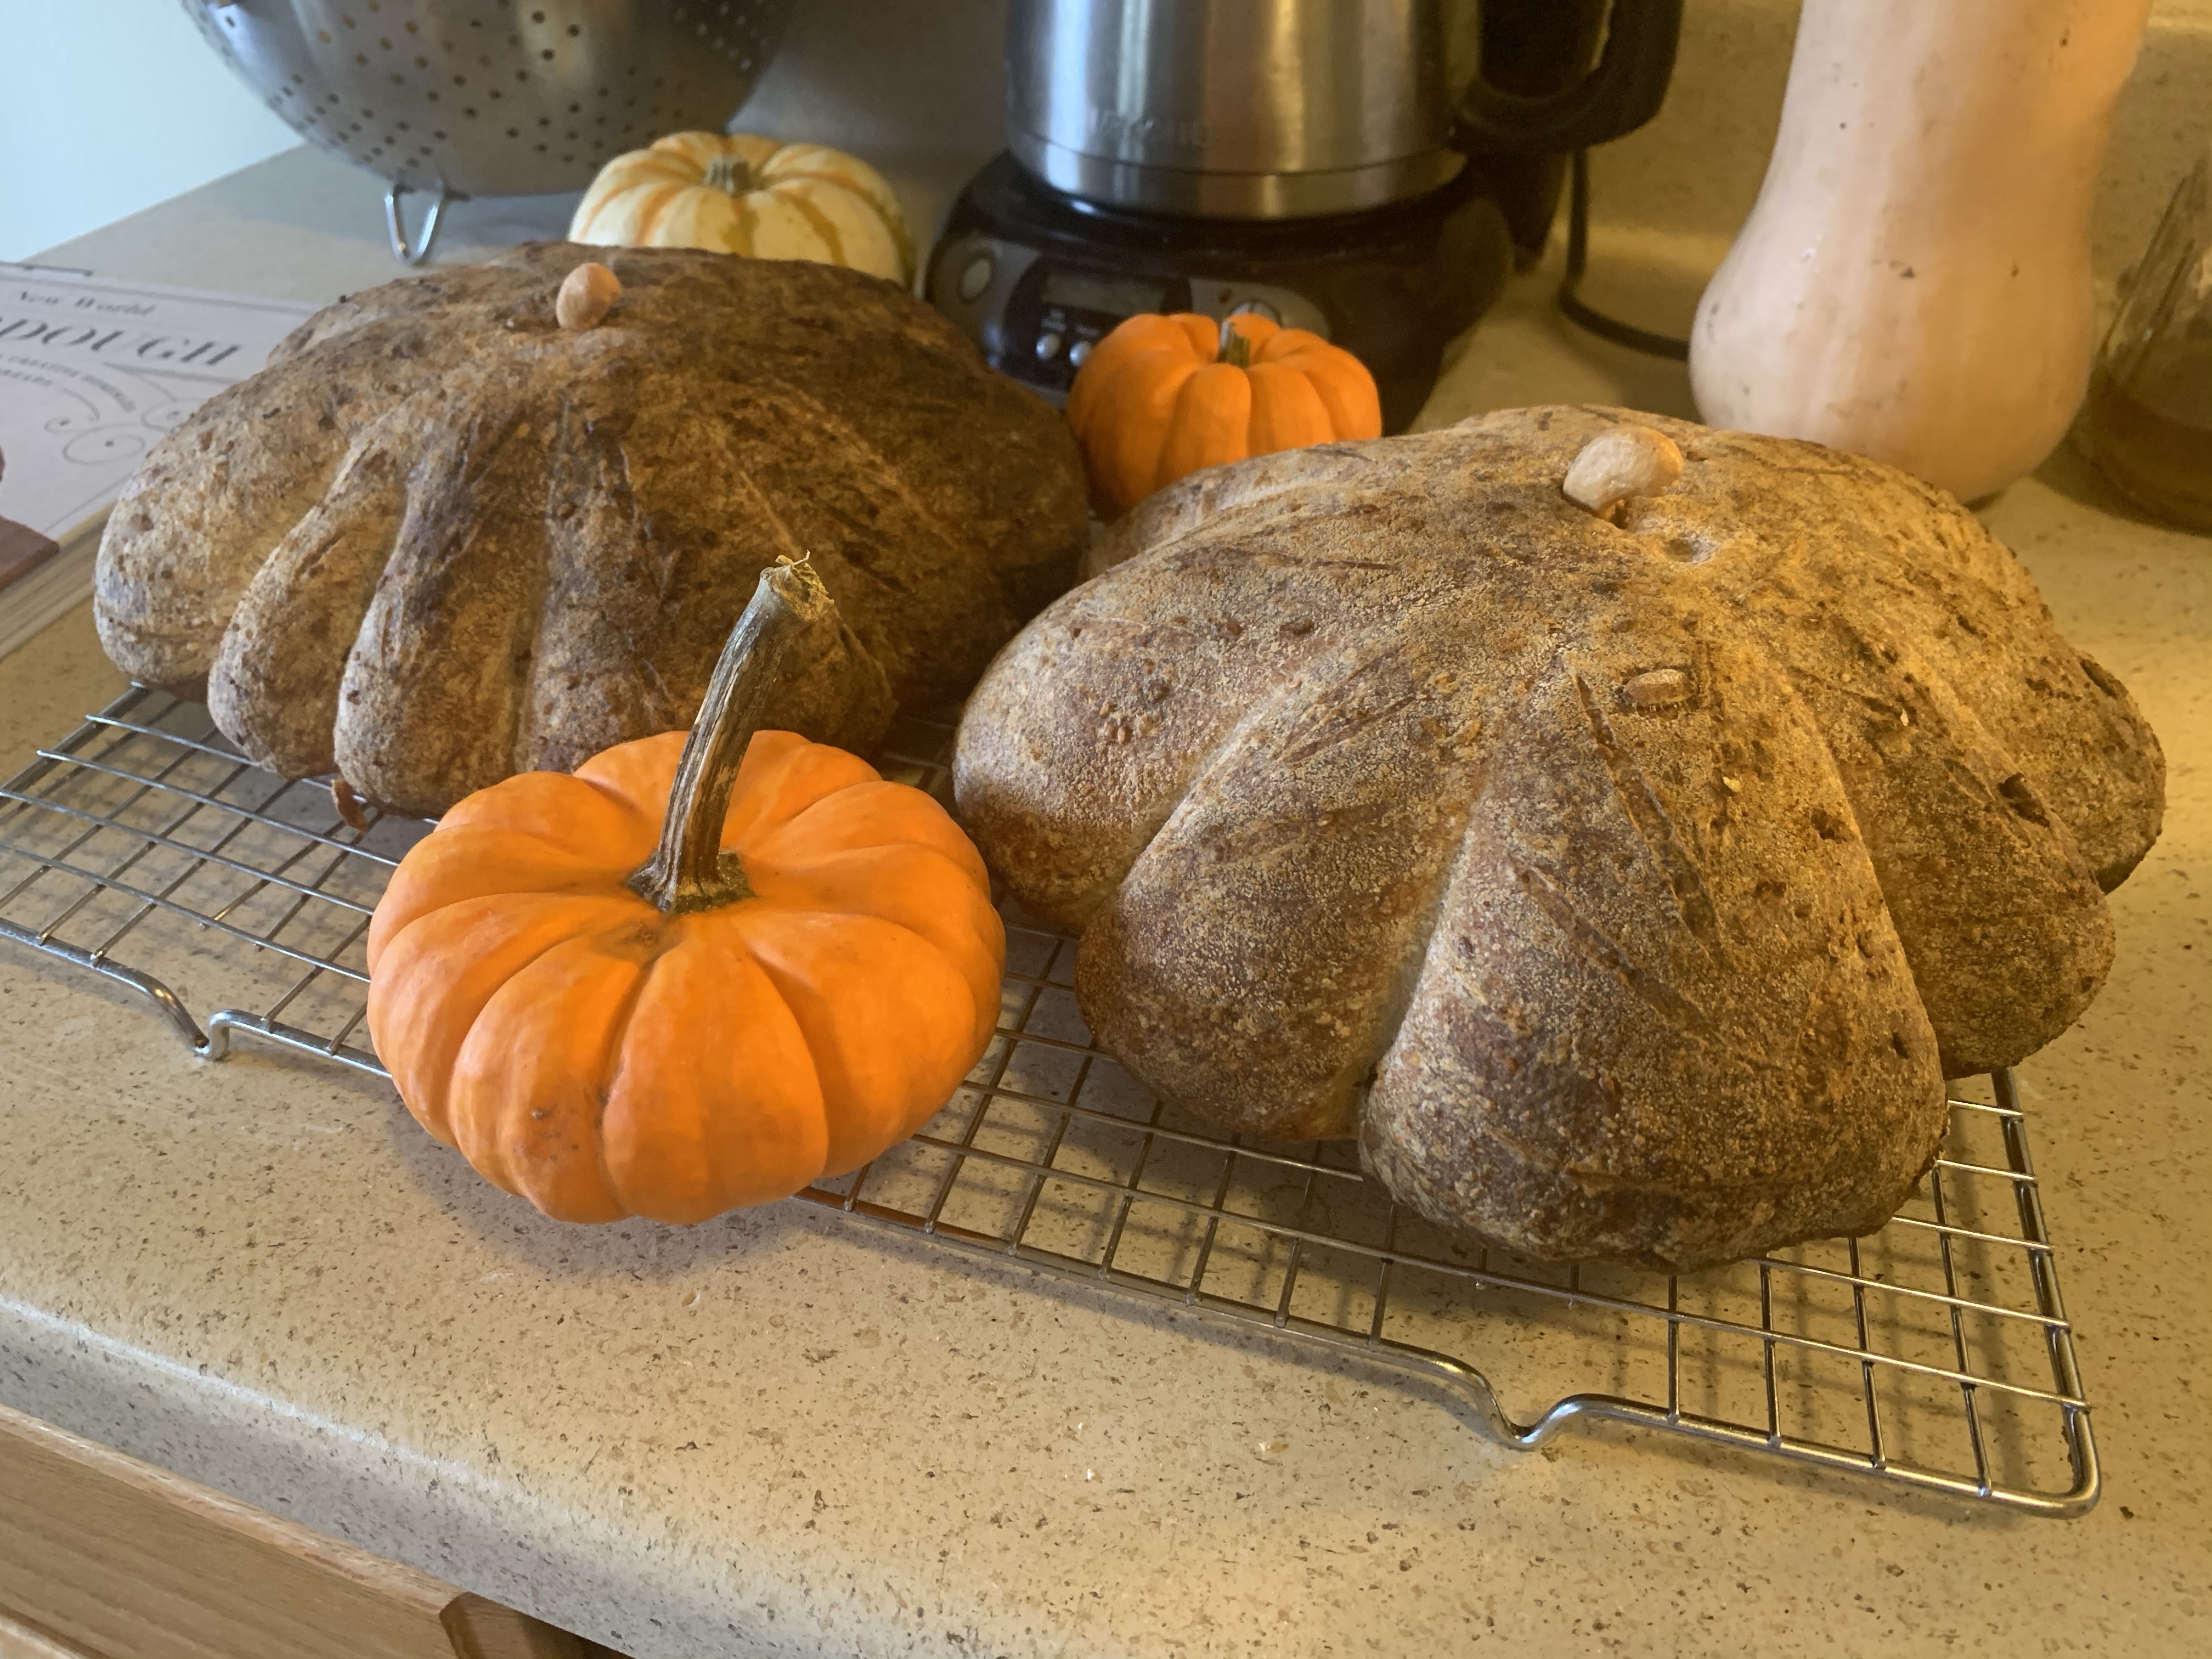
Trick or Treat
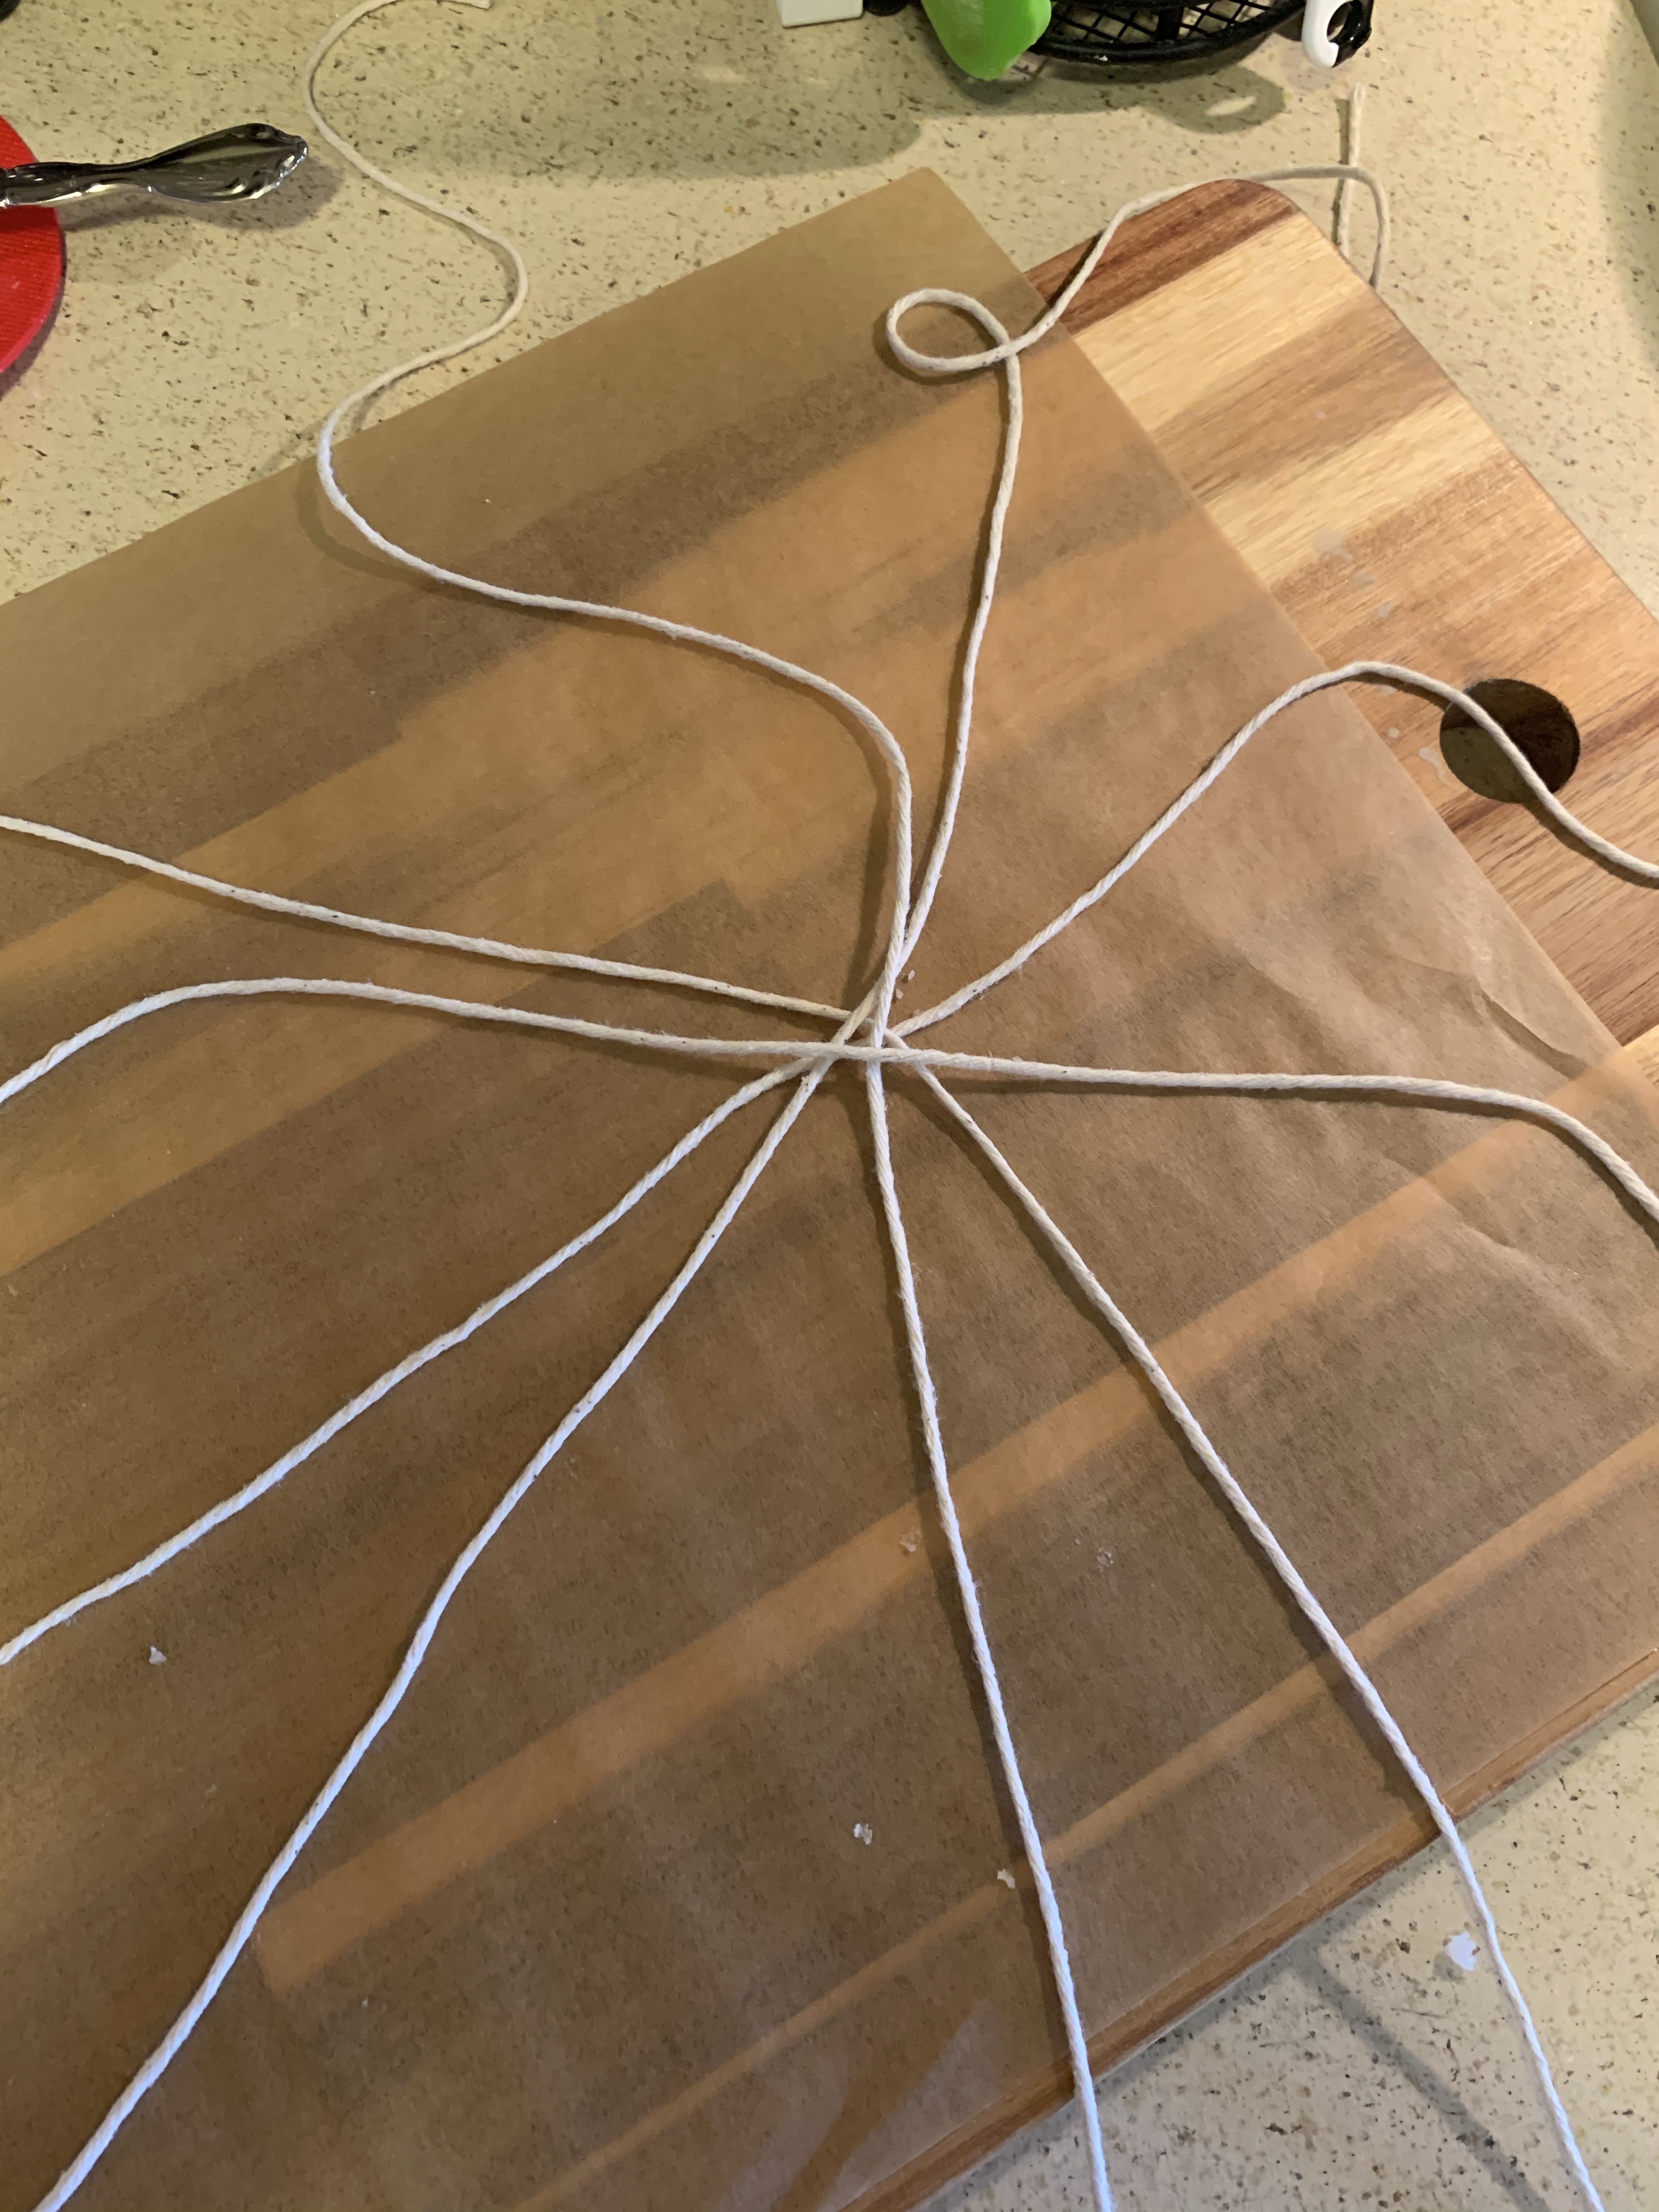
I decided to get into the spirit of the season and attempt a pumpkin-shaped loaf. The basic technique is to tie twine around the dough after it has proofed, immediately before baking. There are different schools of thought on how many lengths of twine should be used; I’ve seen anywhere from three to six. I used five for one and four for another. Each were at least 24 inches long.
More important than the number of strings is the evenness in their application. Once the dough is out and you are tying the strings, it is difficult to keep your perfect angles from becoming more or less acute. The goal is a pumpkin with equally wide segments. I would err on the side of fewer strings (especially as a beginner) simply because that is easier to keep in control.
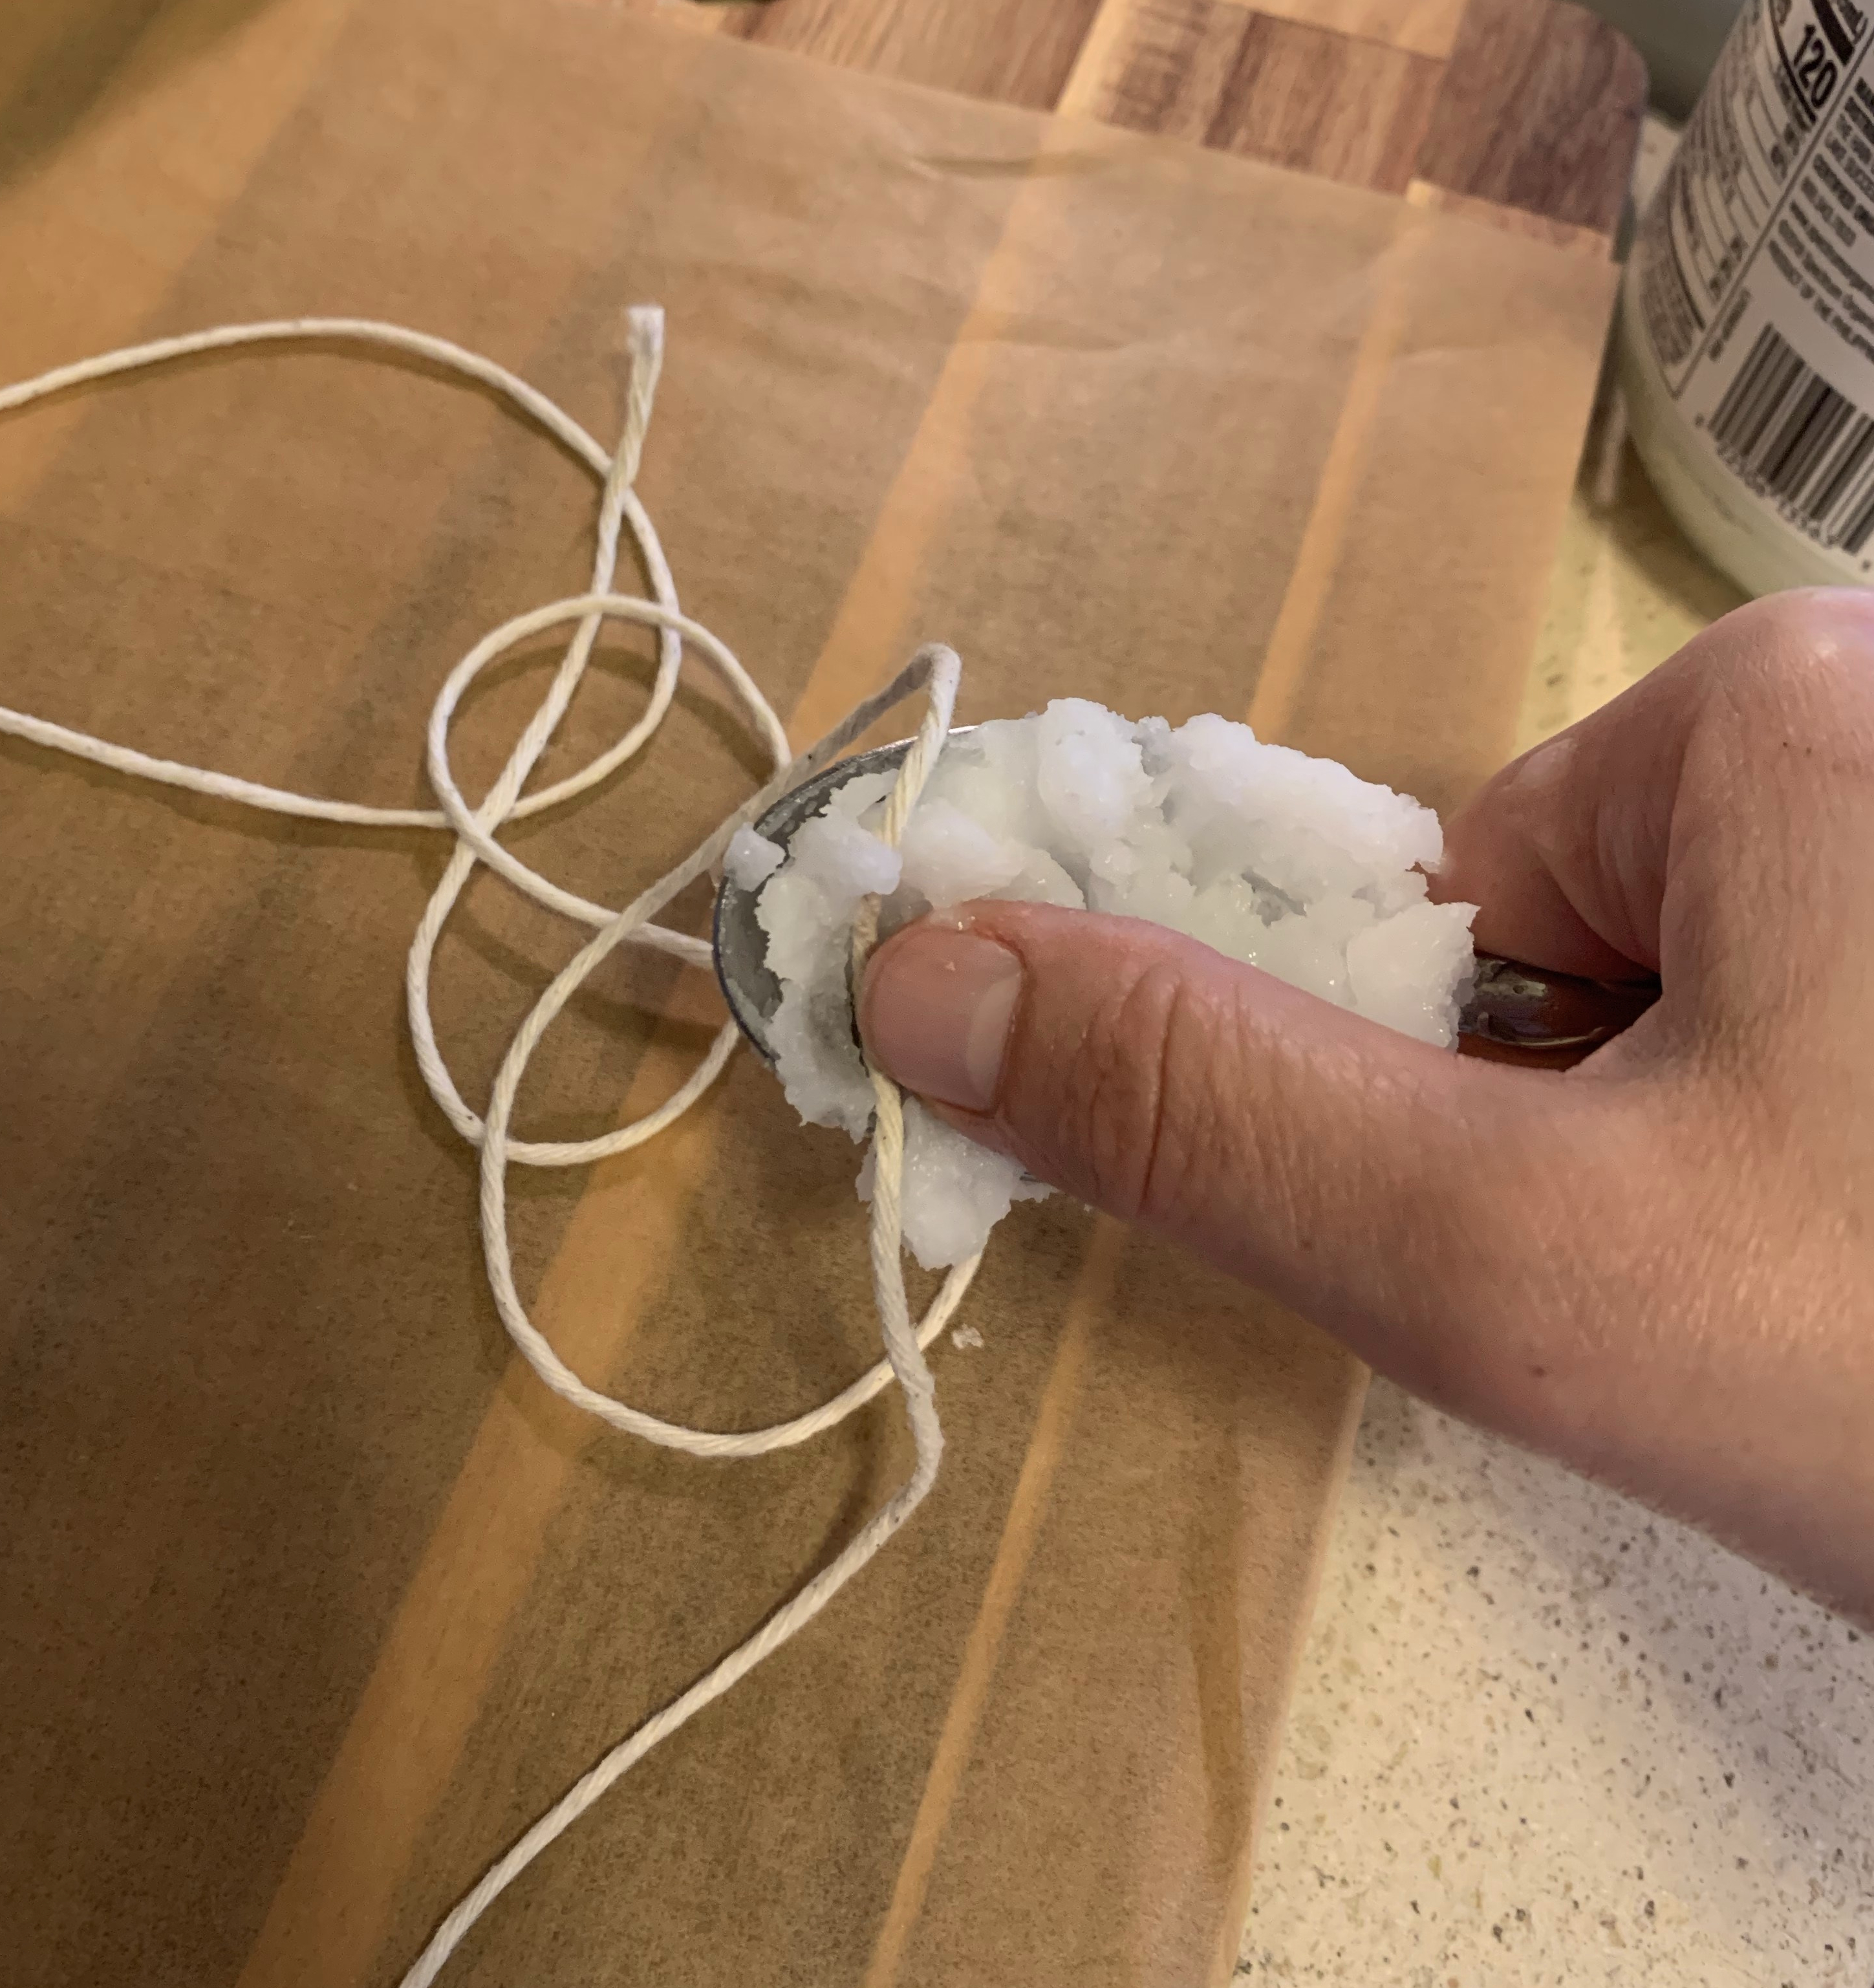
I greased the twine in a couple different ways. For the first loaf, I pulled each string through a clump of coconut oil. For the second, I sprayed them all down with baking spray. In both cases the twine stuck to the loaf somewhat, leaving a fuzzy residue. In the first loaf, the bread baked around he twine itself, but I was able to pull it out without much trouble.
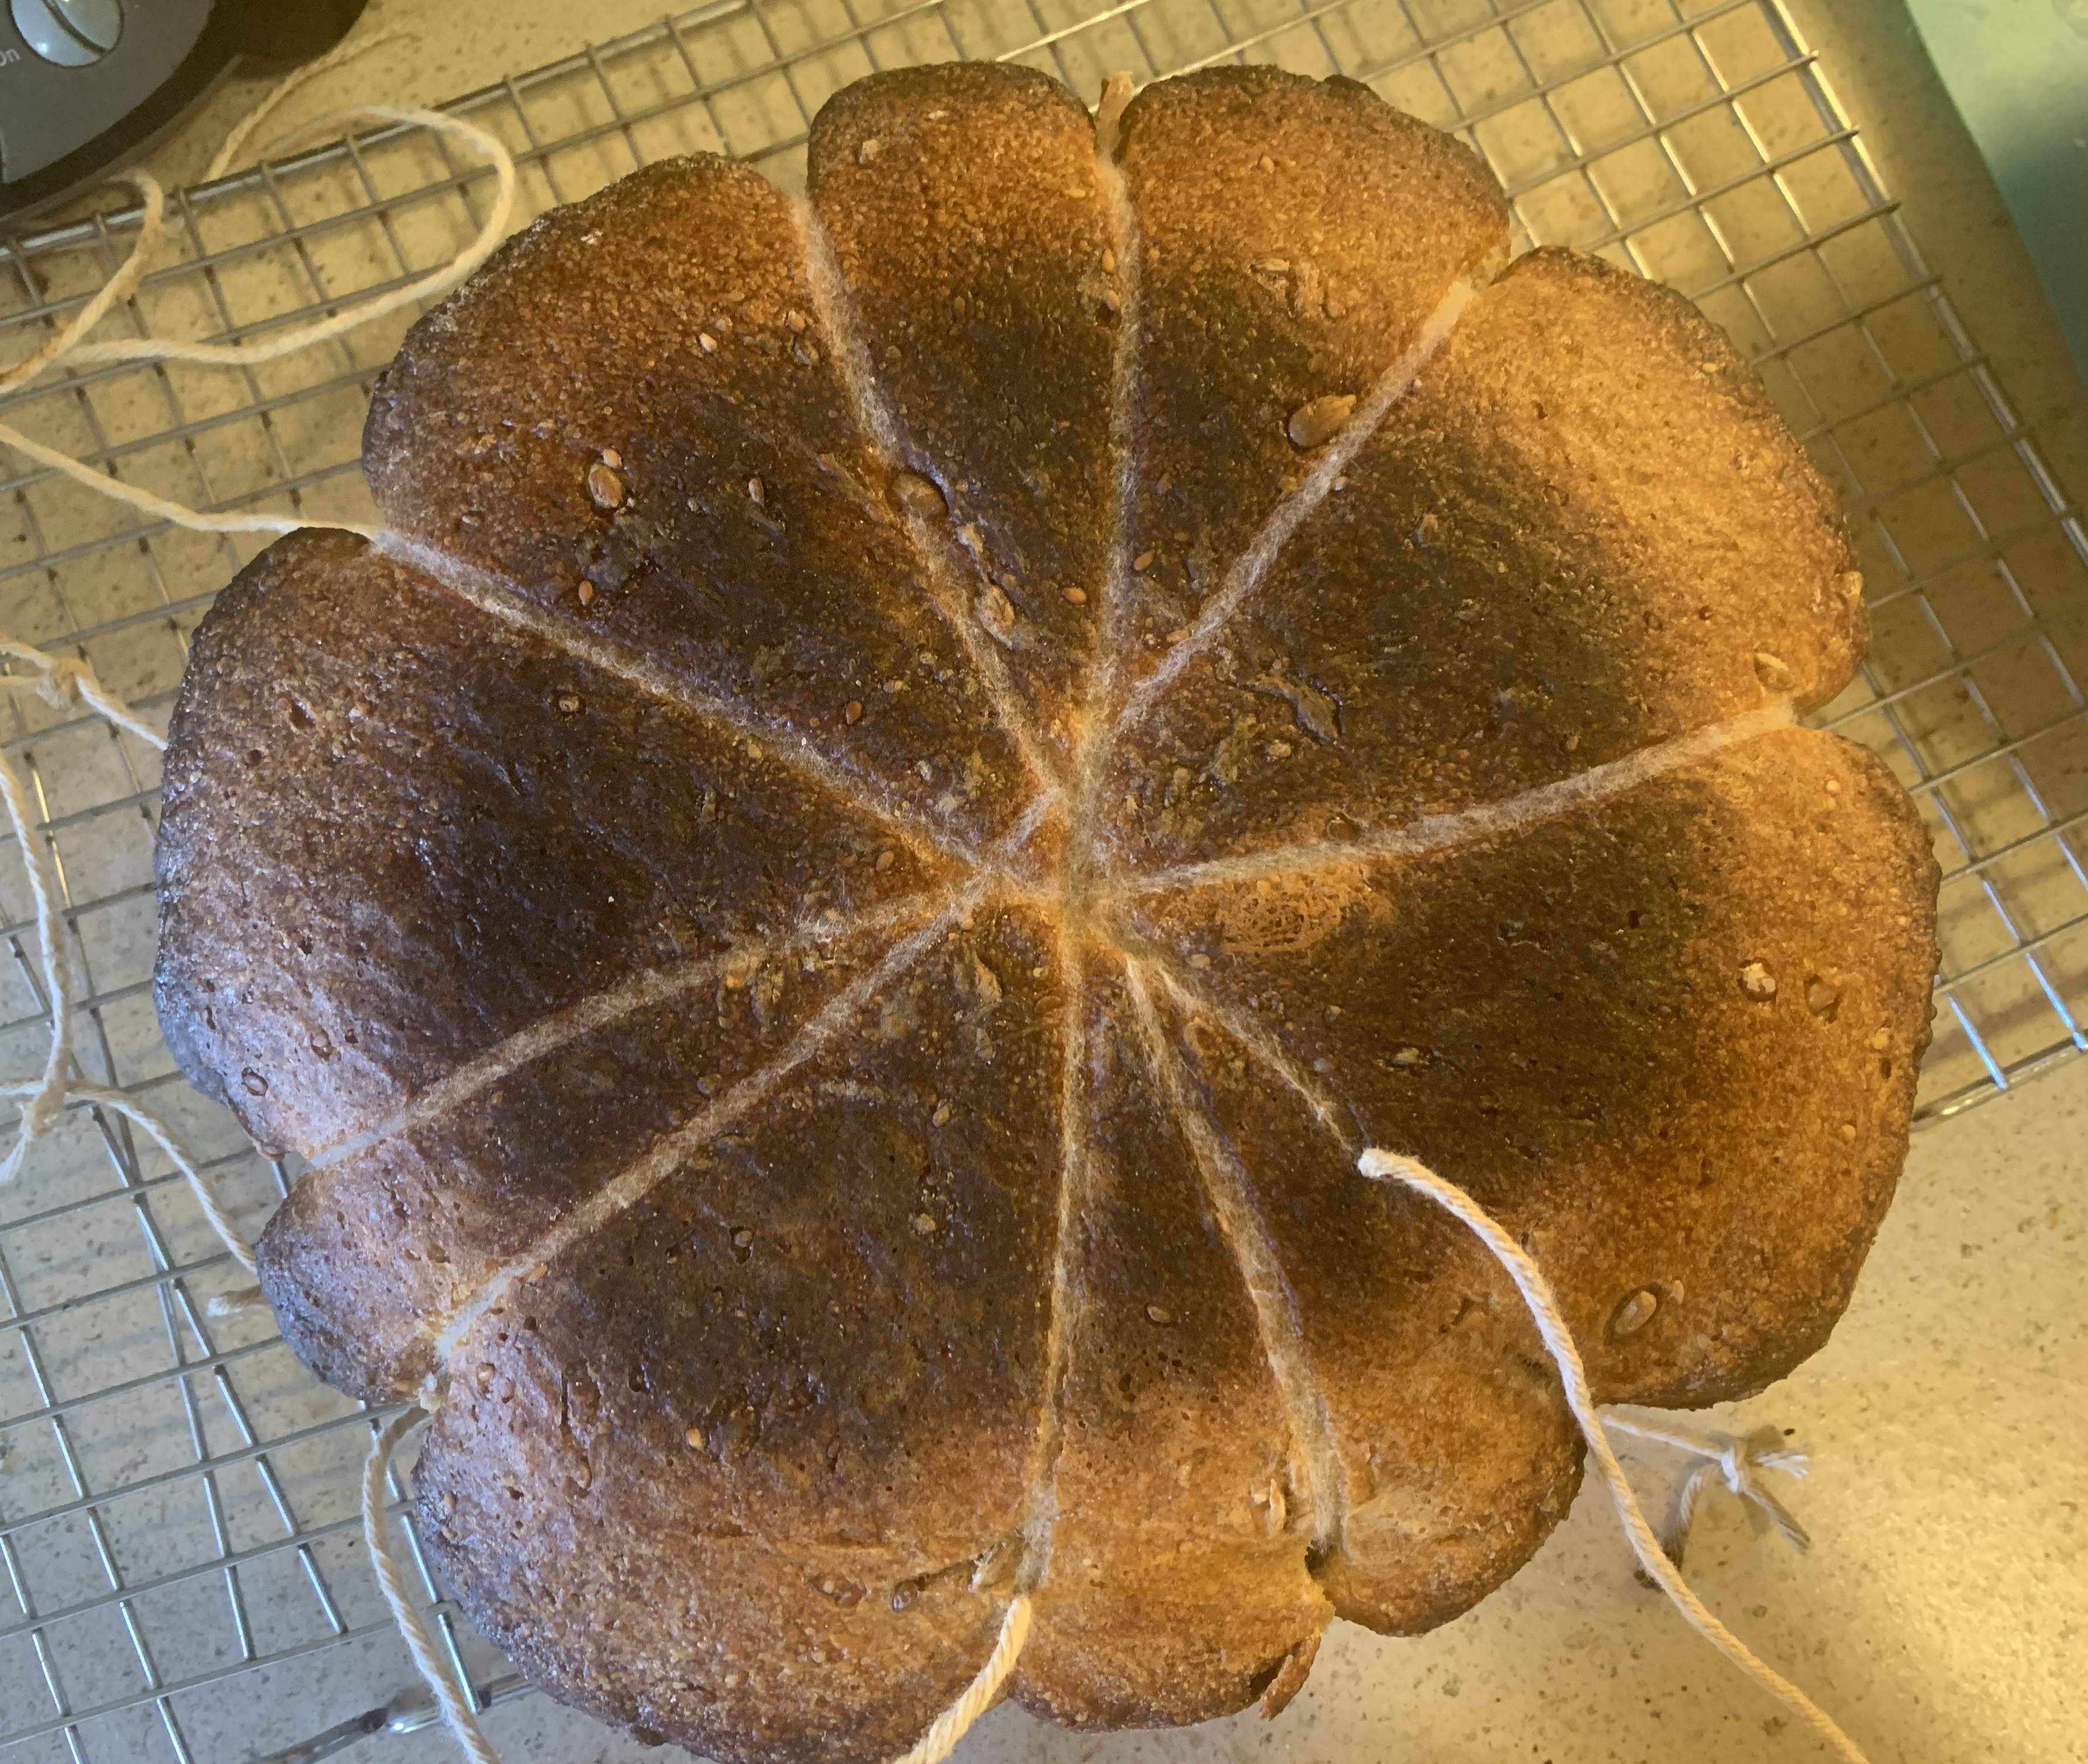
I tied each string and snipped off the excess. Next time I would probably give the dough more room, so that the twine isn’t indenting the sides before it’s baked. (Of course, the dough was so wet it would probably have seeped between the strings, no matter how loose.)

I’ve seen these loaves both scored and unscored. I tried some fancy (for me) scores, but the wet dough absorbed the breaks in baking.

I normally bake boules in dutch ovens. Transferring them from the scoring area to the oven usually results in some wonky bottom shapes. To avoid unneccesary shaping issues for my pumpkins, I baked these on a baking stone. I remembered to preheat my cast iron skillet and added 1/2c cold water upon baking for steam.
Verdict
These loaves did not have much of an oven spring. I only cut one open myself, and it had the signs of what I believe is an underproofed loaf: the crumb was tight in the center and compressed at the bottom, with big holes near the top.
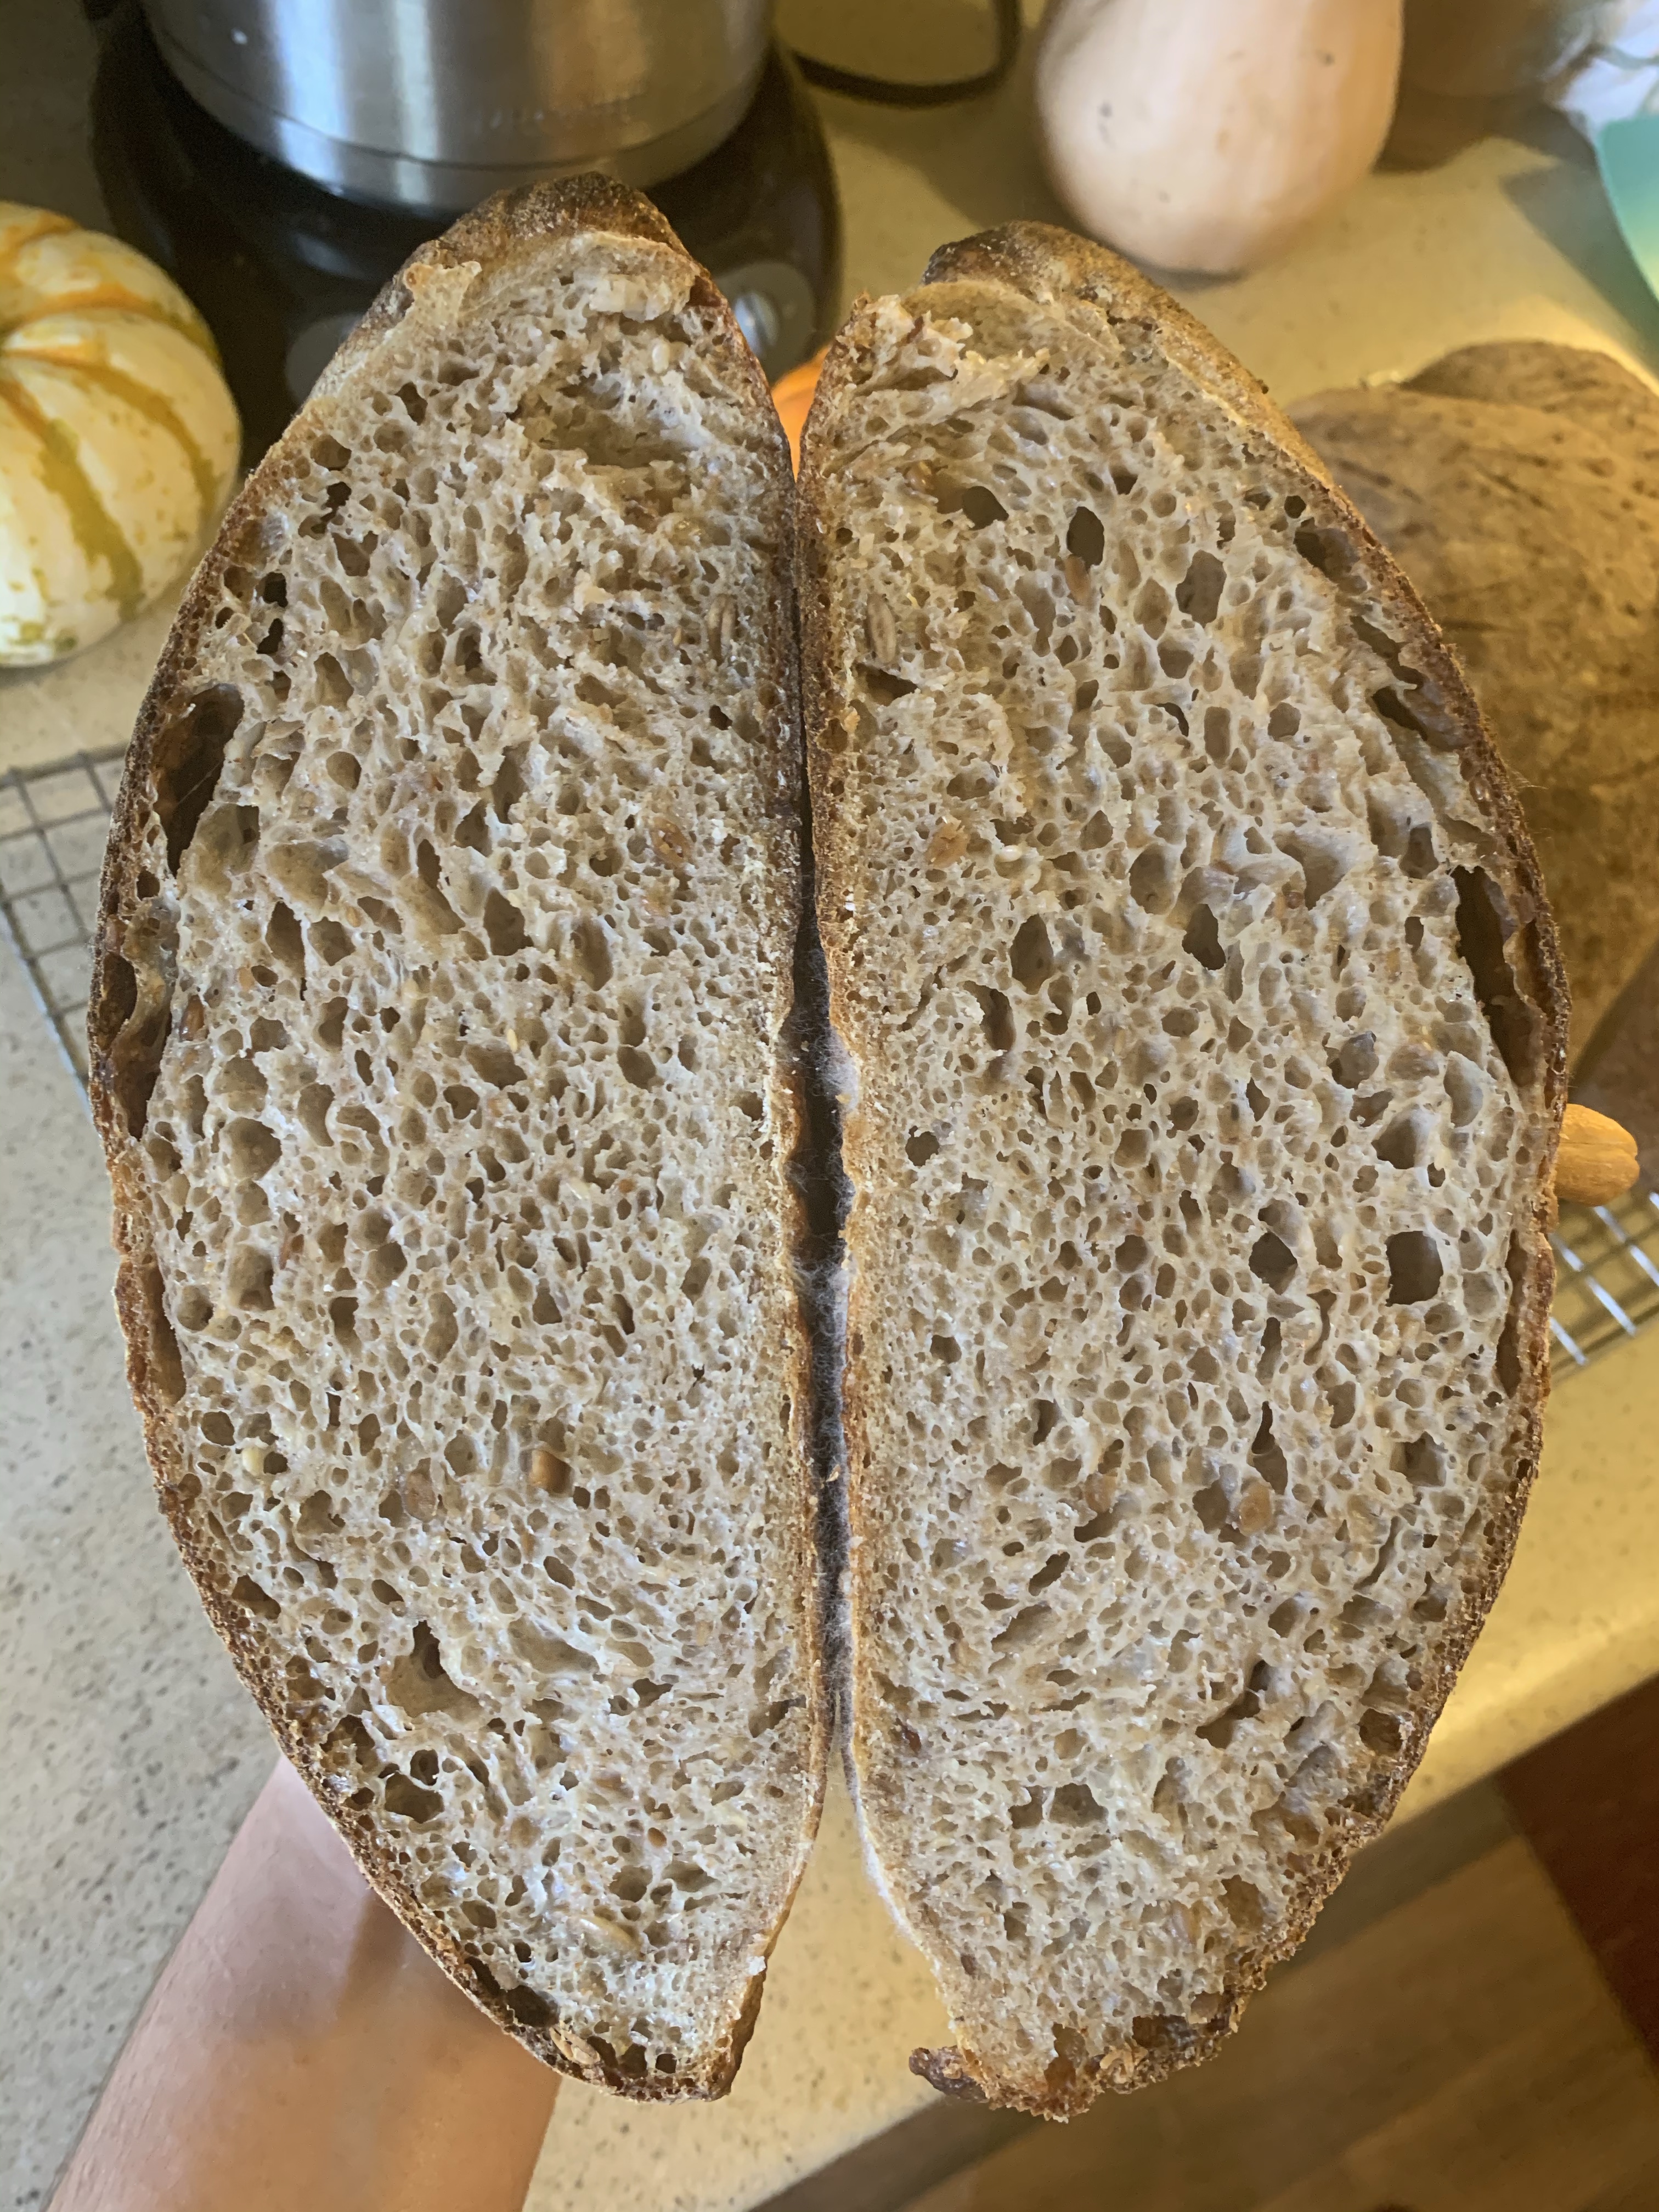
I baked the two loaves in succession; the second loaf had about an hour longer to proof and appeared to rise higher. I’m convinced that the liquid weighed down the dough too much for a healthy rise.
Despite all imperfections, the toasty seed sour was a tasty bread. Sliced thin and eaten with butter, I enjoyed this bread for days. I am partial to toasted nuts and seeds in bread, and I expect to return to this recipe.
In the future I will use less water, do more folds, use a more basic shaping technique, and allow for the maximum proofing time. What can go wrong? I can’t wait to find out.

Pingback: New World Sourdough: Birote + Muffuletta Rolling with the Punches | Put It In Your Hat
Pingback: New World Sourdough: Mallorcas + Baguettesplosion | Put It In Your Hat